
Kenjo → Microsoft Entra ID (formerly Azure AD)
Connect Kenjo to Microsoft Entra ID
When someone joins, moves or leaves in Kenjo, you want that change reflected in Microsoft Entra ID without anyone touching it by hand. To connect Kenjo to Microsoft Entra ID, Joinly reads each HR change at the source — through the Kenjo API — and applies it automatically to the right account. Kenjo stays your source of truth; Joinly is the engine that keeps every action accurate and traceable.
Key takeaways
Kenjo stays your source of truth; Joinly applies every joiner, mover and leaver to Entra ID automatically through the Kenjo API.
Joinly maps Kenjo’s own structures — office, department, team and area — to the right Entra ID groups and licences, which a plain API import can’t do on its own.
For deskless and shift-based staff who have no existing email, Joinly generates a unique, predictable UPN from your naming rules rather than depending on an address that isn’t there.
Kenjo has no native Entra provisioning app, so without Joinly the role-to-group and licence logic falls to a custom script or manual work; Joinly builds and maintains it for you.
Every action is logged for a complete audit trail, aligned with NIS2 and ISO 27001.


Quick facts
Source system | Kenjo (Kenjo HR) |
Target system | Microsoft Entra ID (formerly Azure AD) |
Connection method | Kenjo API → Entra ID |
Supported events | Joiner, mover, leaver |
Synced attributes | Name, email / UPN, department, team, office, area, job title, manager, start and end date |
Authentication | Kenjo API key (Connect plan), scoped to the org and employee endpoints, over outbound HTTPS |
Real-time or batch | Frequent sync, multiple times per day |
Compliance | ISO 27001, NIS2-ready, GDPR (EU data centre) |
Liever in het Nederlands? Kenjo koppelen met Microsoft Entra ID
How does Joinly sync Kenjo to Microsoft Entra ID?
Joinly reads each HR change in Kenjo through the API and applies it to the matching Entra ID account automatically. Kenjo holds the authoritative employee record, so it is the starting point for each identity action.
Joiner. HR completes the hire in Kenjo. Joinly reads the new employee record and determines the role from attributes like office, department, team and area. It then creates the account in Entra ID, assigns the right licences and maps the person into the correct groups — generating a unique UPN even when the new starter has no existing email address.
Mover. When someone changes department, team, office or area in Kenjo, Joinly updates their group membership, permissions and licences to match. Access that no longer fits the new position is revoked, so permissions stay aligned with the actual job.
Leaver. When Kenjo records that someone has left, Joinly disables the Entra ID account automatically. There are no orphaned accounts left active after a leaver, and no licence quietly keeps costing money.
Example: A hospitality group hires a front-desk supervisor in Kenjo, assigned to its Barcelona office and its Reception team. Joinly reads the record, creates the Entra ID account, assigns a Business Basic licence and adds the supervisor to the ES-Reception group. Because the new starter has no prior email, Joinly builds the UPN from a name rule with a collision fallback, so the login is unique from day one. When that supervisor later moves to the Events team, Joinly swaps the groups the same day.
What manual user management costs
Without automation, every account starts as a Kenjo notification or a line in a spreadsheet that IT works through by hand. Kenjo has no native Entra provisioning app, so even a scripted API import moves attributes but leaves the part that actually decides access — which groups, which licence, which UPN — to people.
Onboarding delays. New joiners wait for accounts, licences and group access while a request sits in a queue, losing productive time in their first shift or first week.
Permissions that don’t keep up (privilege creep). When movers change team, office or area, old access often stays attached, so people accumulate rights they no longer need.
Forgotten offboarding. Accounts that aren’t disabled on time are both a security and audit risk, and unused licences keep costing money — a real problem in high-turnover, shift-based teams.
Joinly vs. a custom Kenjo API import
Kenjo has no dedicated Entra provisioning app, so the alternative is a custom API-driven import (or Microsoft’s API-driven inbound provisioning). It can move attributes, but it stops short of the part that actually decides access. Here’s how the two compare for a Kenjo-driven setup.
Joinly | Custom Kenjo API / API-driven inbound provisioning | |
|---|---|---|
Source | Reads the Kenjo API directly | Reads the Kenjo API via custom code |
Role-to-group mapping | Built in, rule-based on office / department / team / area | You build and maintain the logic yourself |
UPN for staff with no email | Generated from name rules with a uniqueness fallback | Manual or scripted per case |
Licence assignment | Driven by role / attributes | Manual or group-based only |
On-premise AD | Yes, own agent plus the native Microsoft agent | Not covered without extra tooling |
Maintenance | Managed and updated as Kenjo changes | Your team owns the script long-term |
Audit trail | Per-action logging tied to the HR source | Whatever you build and log yourself |
Watch-outs when connecting Kenjo to Microsoft Entra ID
A few Kenjo-specific details decide whether this connection stays reliable at scale.
Mapping Kenjo structures to Entra groups. Office, department, team and area don’t translate one-to-one to Entra ID groups, and in an SME the data is often lighter than in enterprise HCM. Joinly builds explicit mapping rules from those structures to the correct groups and licences, so role drives access rather than manual assignment.
Staff without a company email. Kenjo is built for deskless and shift-based teams, so many new starters have no existing email to copy a UPN from. Joinly generates a unique UPN and display name from your naming rules, with a controlled tiebreaker for duplicate names.
API key scope on the Connect plan. The Kenjo API is enabled per account and each key is scoped. The key must be granted the office, department, team, area and employee endpoints. Joinly tells you exactly which scopes to enable, so the sync has the data it needs without over-granting access.
High turnover and rehires. Shift-based workforces churn, and the same person may return. Joinly matches returning people to their existing account instead of creating duplicates, and disables leavers promptly so licences aren’t wasted.
Joinly handles each of these by default with custom mapping and transformation.
Always audit-ready
Every account action Joinly performs is logged: who was affected, when it happened, which access changed and which Kenjo change triggered it. For NIS2 that matters directly: access can be traced back to an authorised HR source rather than an ad-hoc request. Joinly is ISO 27001 certified, runs in an EU data centre in Amsterdam, applies least-privilege by default, and is built to meet NIS2 and ISO 27001.
Example case
Picture a hospitality group with around 1,800 employees across a dozen hotels and restaurants, running Kenjo for its shift-based teams while identity is still handled by hand. Most front-of-house and kitchen staff have no company email when they start, so IT builds each Entra ID account manually from the Kenjo record — inventing a login, picking the licence, adding groups. With seasonal peaks and high turnover the queue never empties, and a new waiter or receptionist often waits until their second or third shift before they can clock in on the systems they need.
Connect Kenjo to Microsoft Entra ID with Joinly and that work disappears. Joinly reads each change in Kenjo at the source and acts on it automatically: new hires have their account, licence and group access ready in time for their first shift, a move from Reception to Events swaps the right groups the same day, returning seasonal staff are matched back to their old account instead of getting a duplicate, and leavers are disabled promptly so no licence keeps billing.
“Half our people start without an email, so every account used to be a manual build. Now a login is simply ready before the shift starts, a team change just swaps the groups, and we can show exactly which Kenjo change created every bit of access.” — Head of IT, hospitality group
The outcome this setup is designed for: onboarding drops from days to zero touch for shift staff, privilege creep from old teams is eliminated, and the team can walk into its next NIS2 assessment with a complete, source-backed audit trail.
Installation guide
Follow these steps to connect Kenjo to Microsoft Entra ID with Joinly. The entire cloud setup happens in the platform, with no scripts or local software required.
1. Create your account
Go to platform.joinly.app and create your account.
Note: charges may apply for using the platform after the trial period ends.
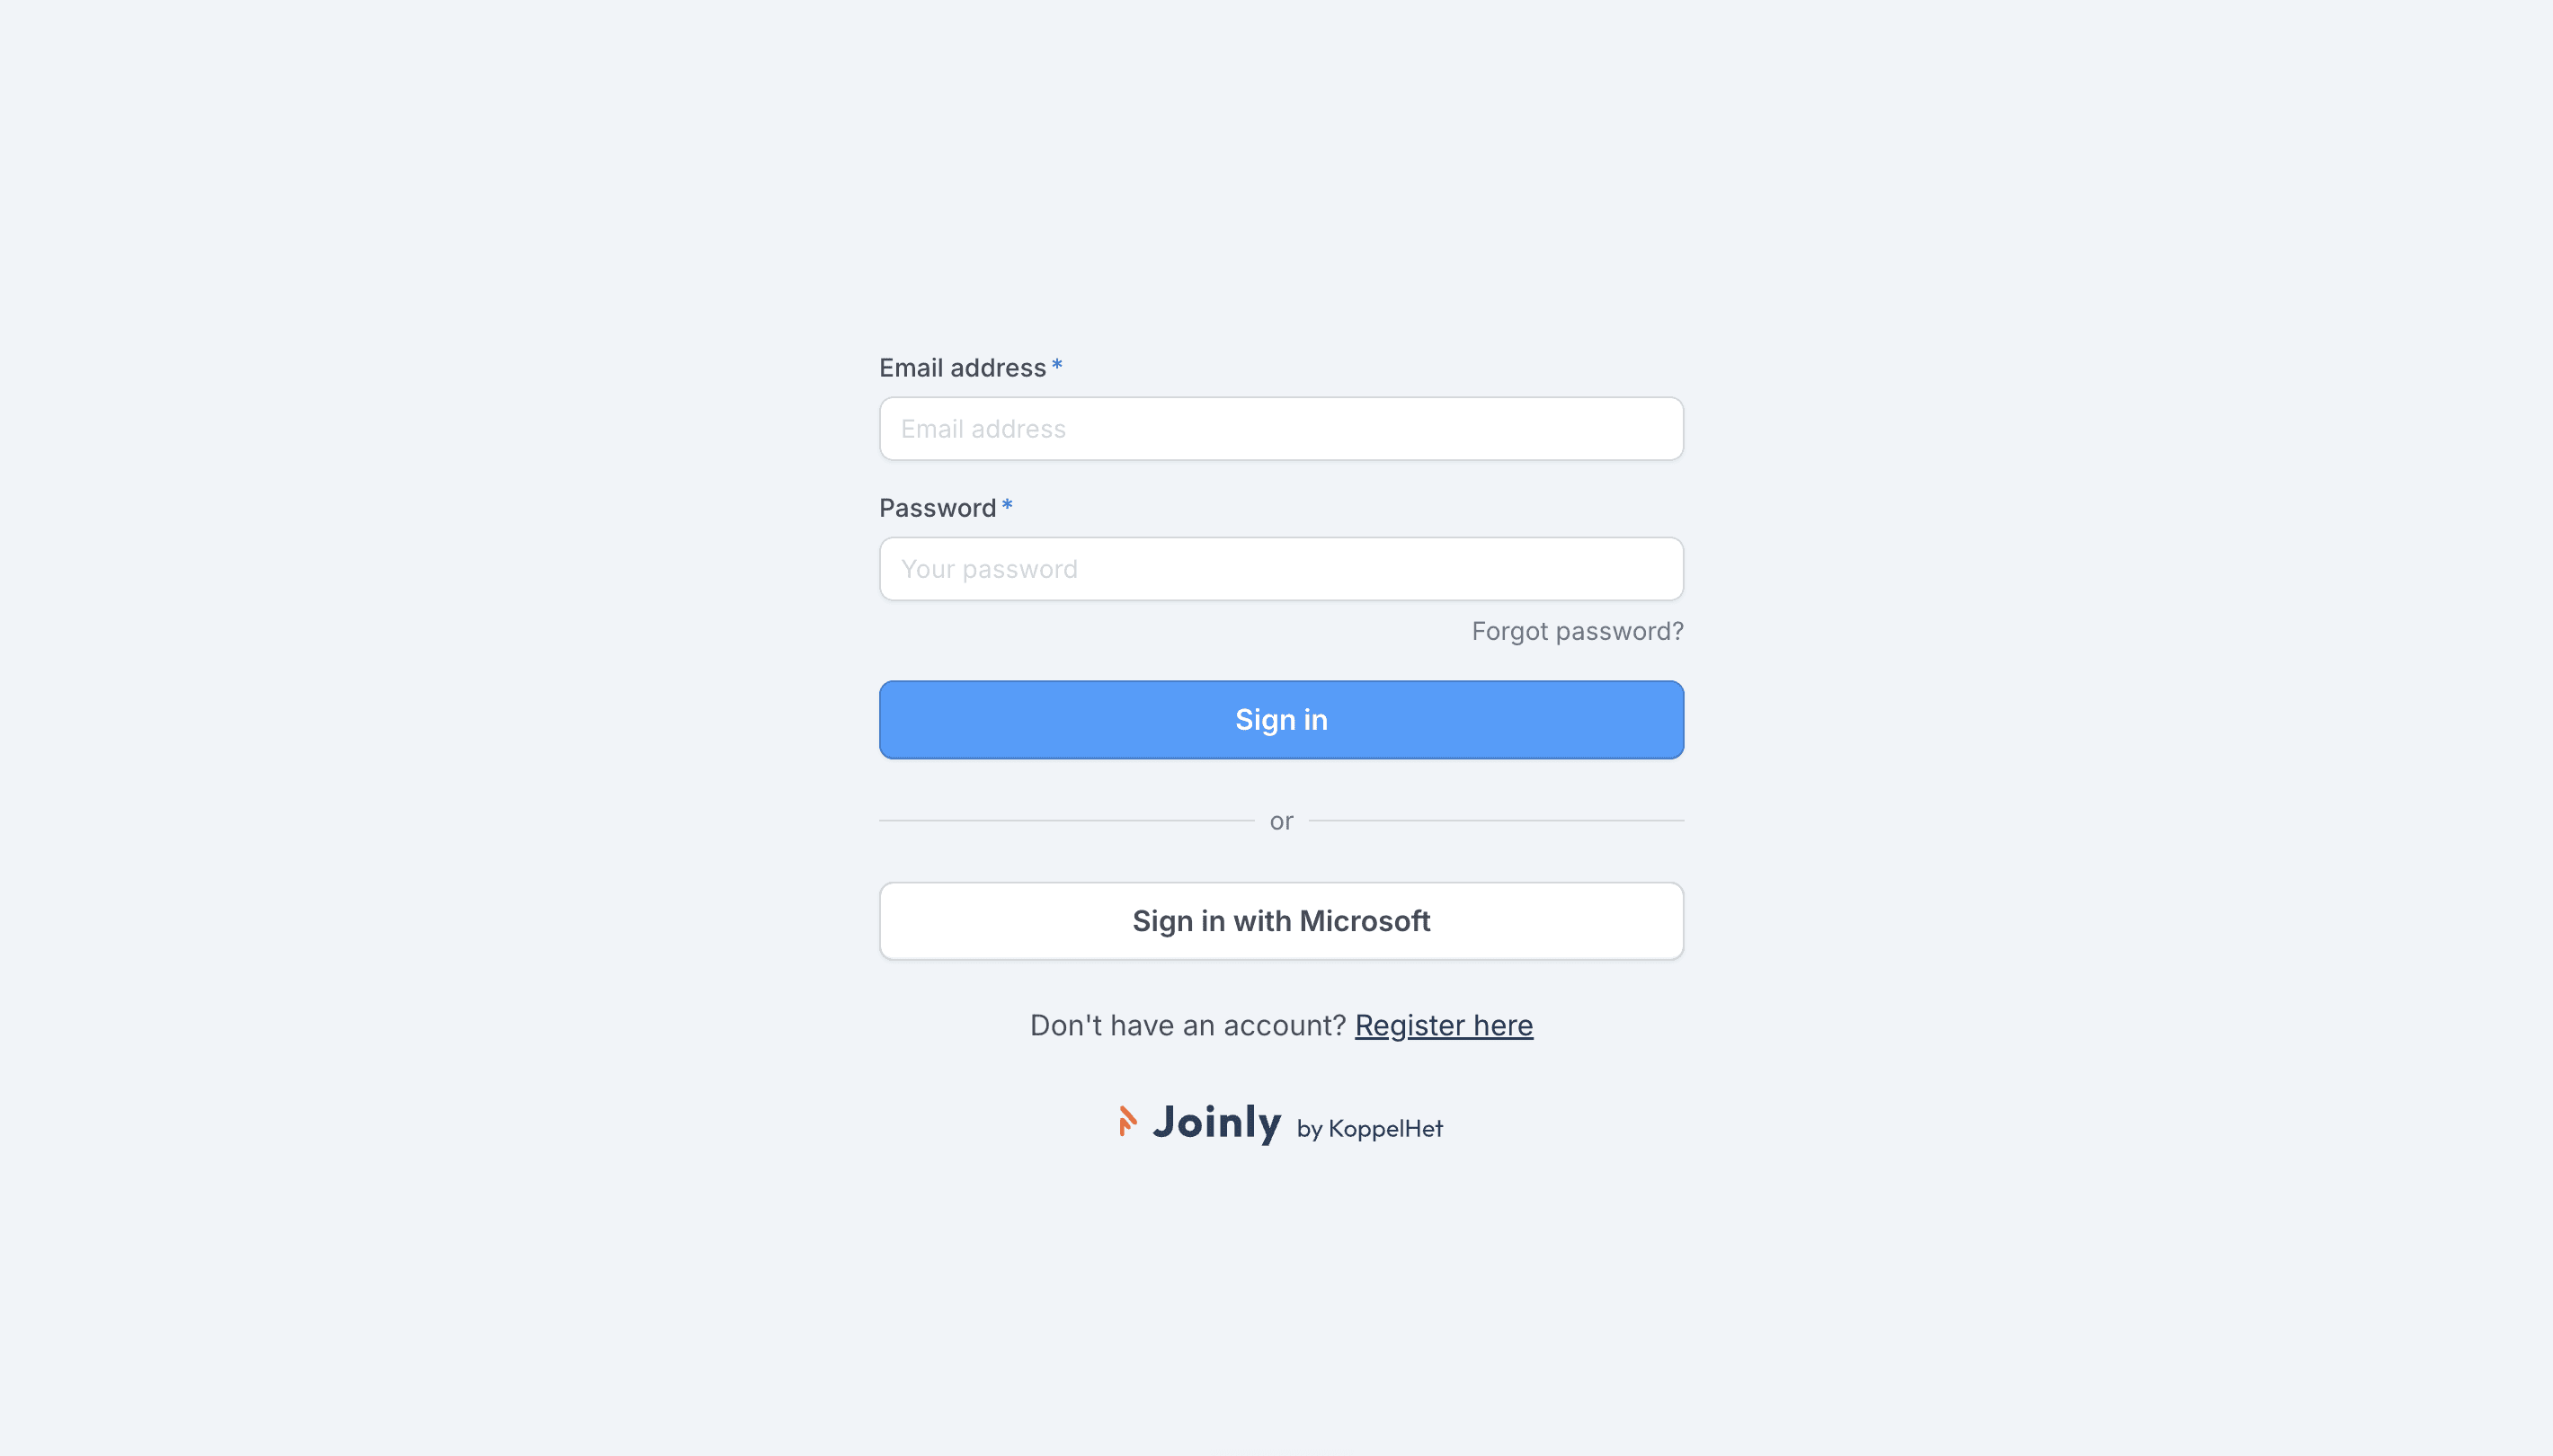
Sign up at platform.joinly.app to get started.
2. Connect your Microsoft account
Open platform.joinly.app/settings/provisioning/idp-setup and connect your Microsoft tenant. Select the scopes you need. For provisioning you don’t need any additional scopes.
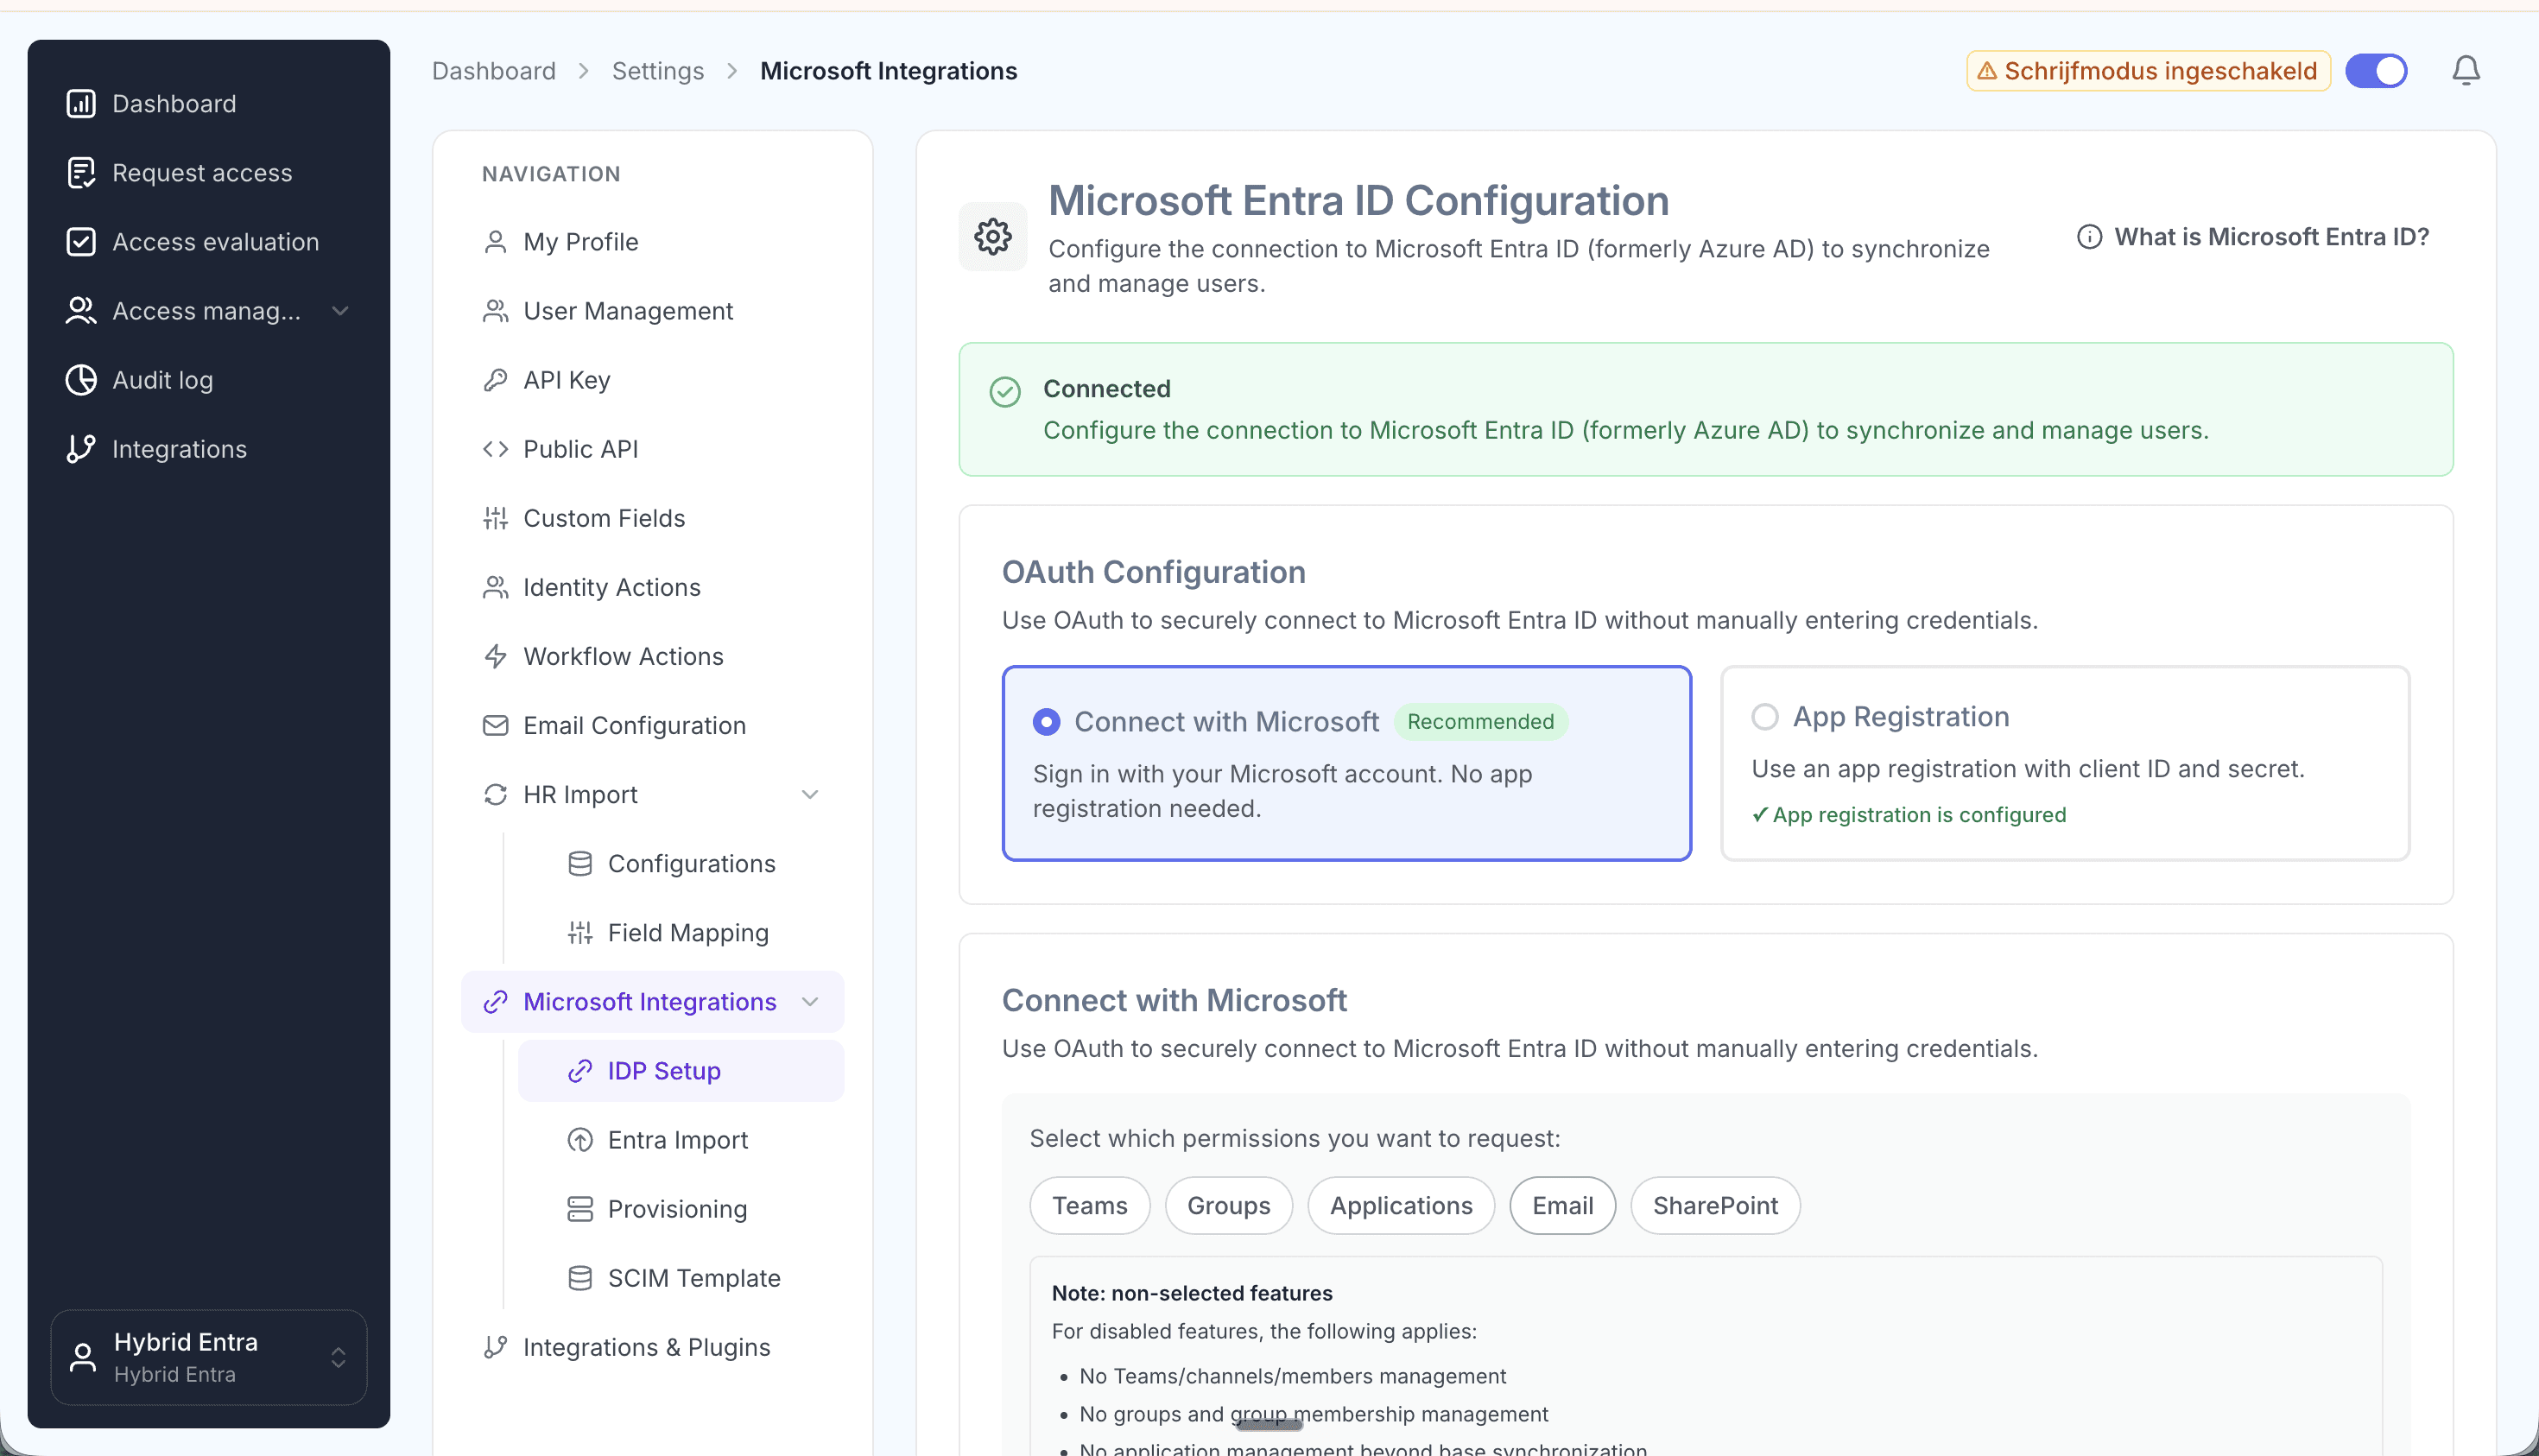
Connect your Microsoft tenant and pick your scopes.
3. Import your existing accounts from Entra ID
Import all existing accounts from Entra ID at platform.joinly.app/settings/provisioning/entra-import. This gives Joinly a baseline of every account that already exists, so it can match people to their current account instead of creating duplicates.
4. Enable the Kenjo API and generate a key
In Kenjo, go to Settings → Integrations and toggle API on (available on the Connect plan). Then generate an API key under API Keys and grant it access to the company, office, department, team, area and employee endpoints. Copy the key immediately — Kenjo only shows it once.
5. Find the Kenjo integration in the Joinly marketplace
Open the Joinly marketplace and search for the Kenjo integration.
Don’t see your system listed? Get in touch at support@koppelhet.nl and we’ll help you out.
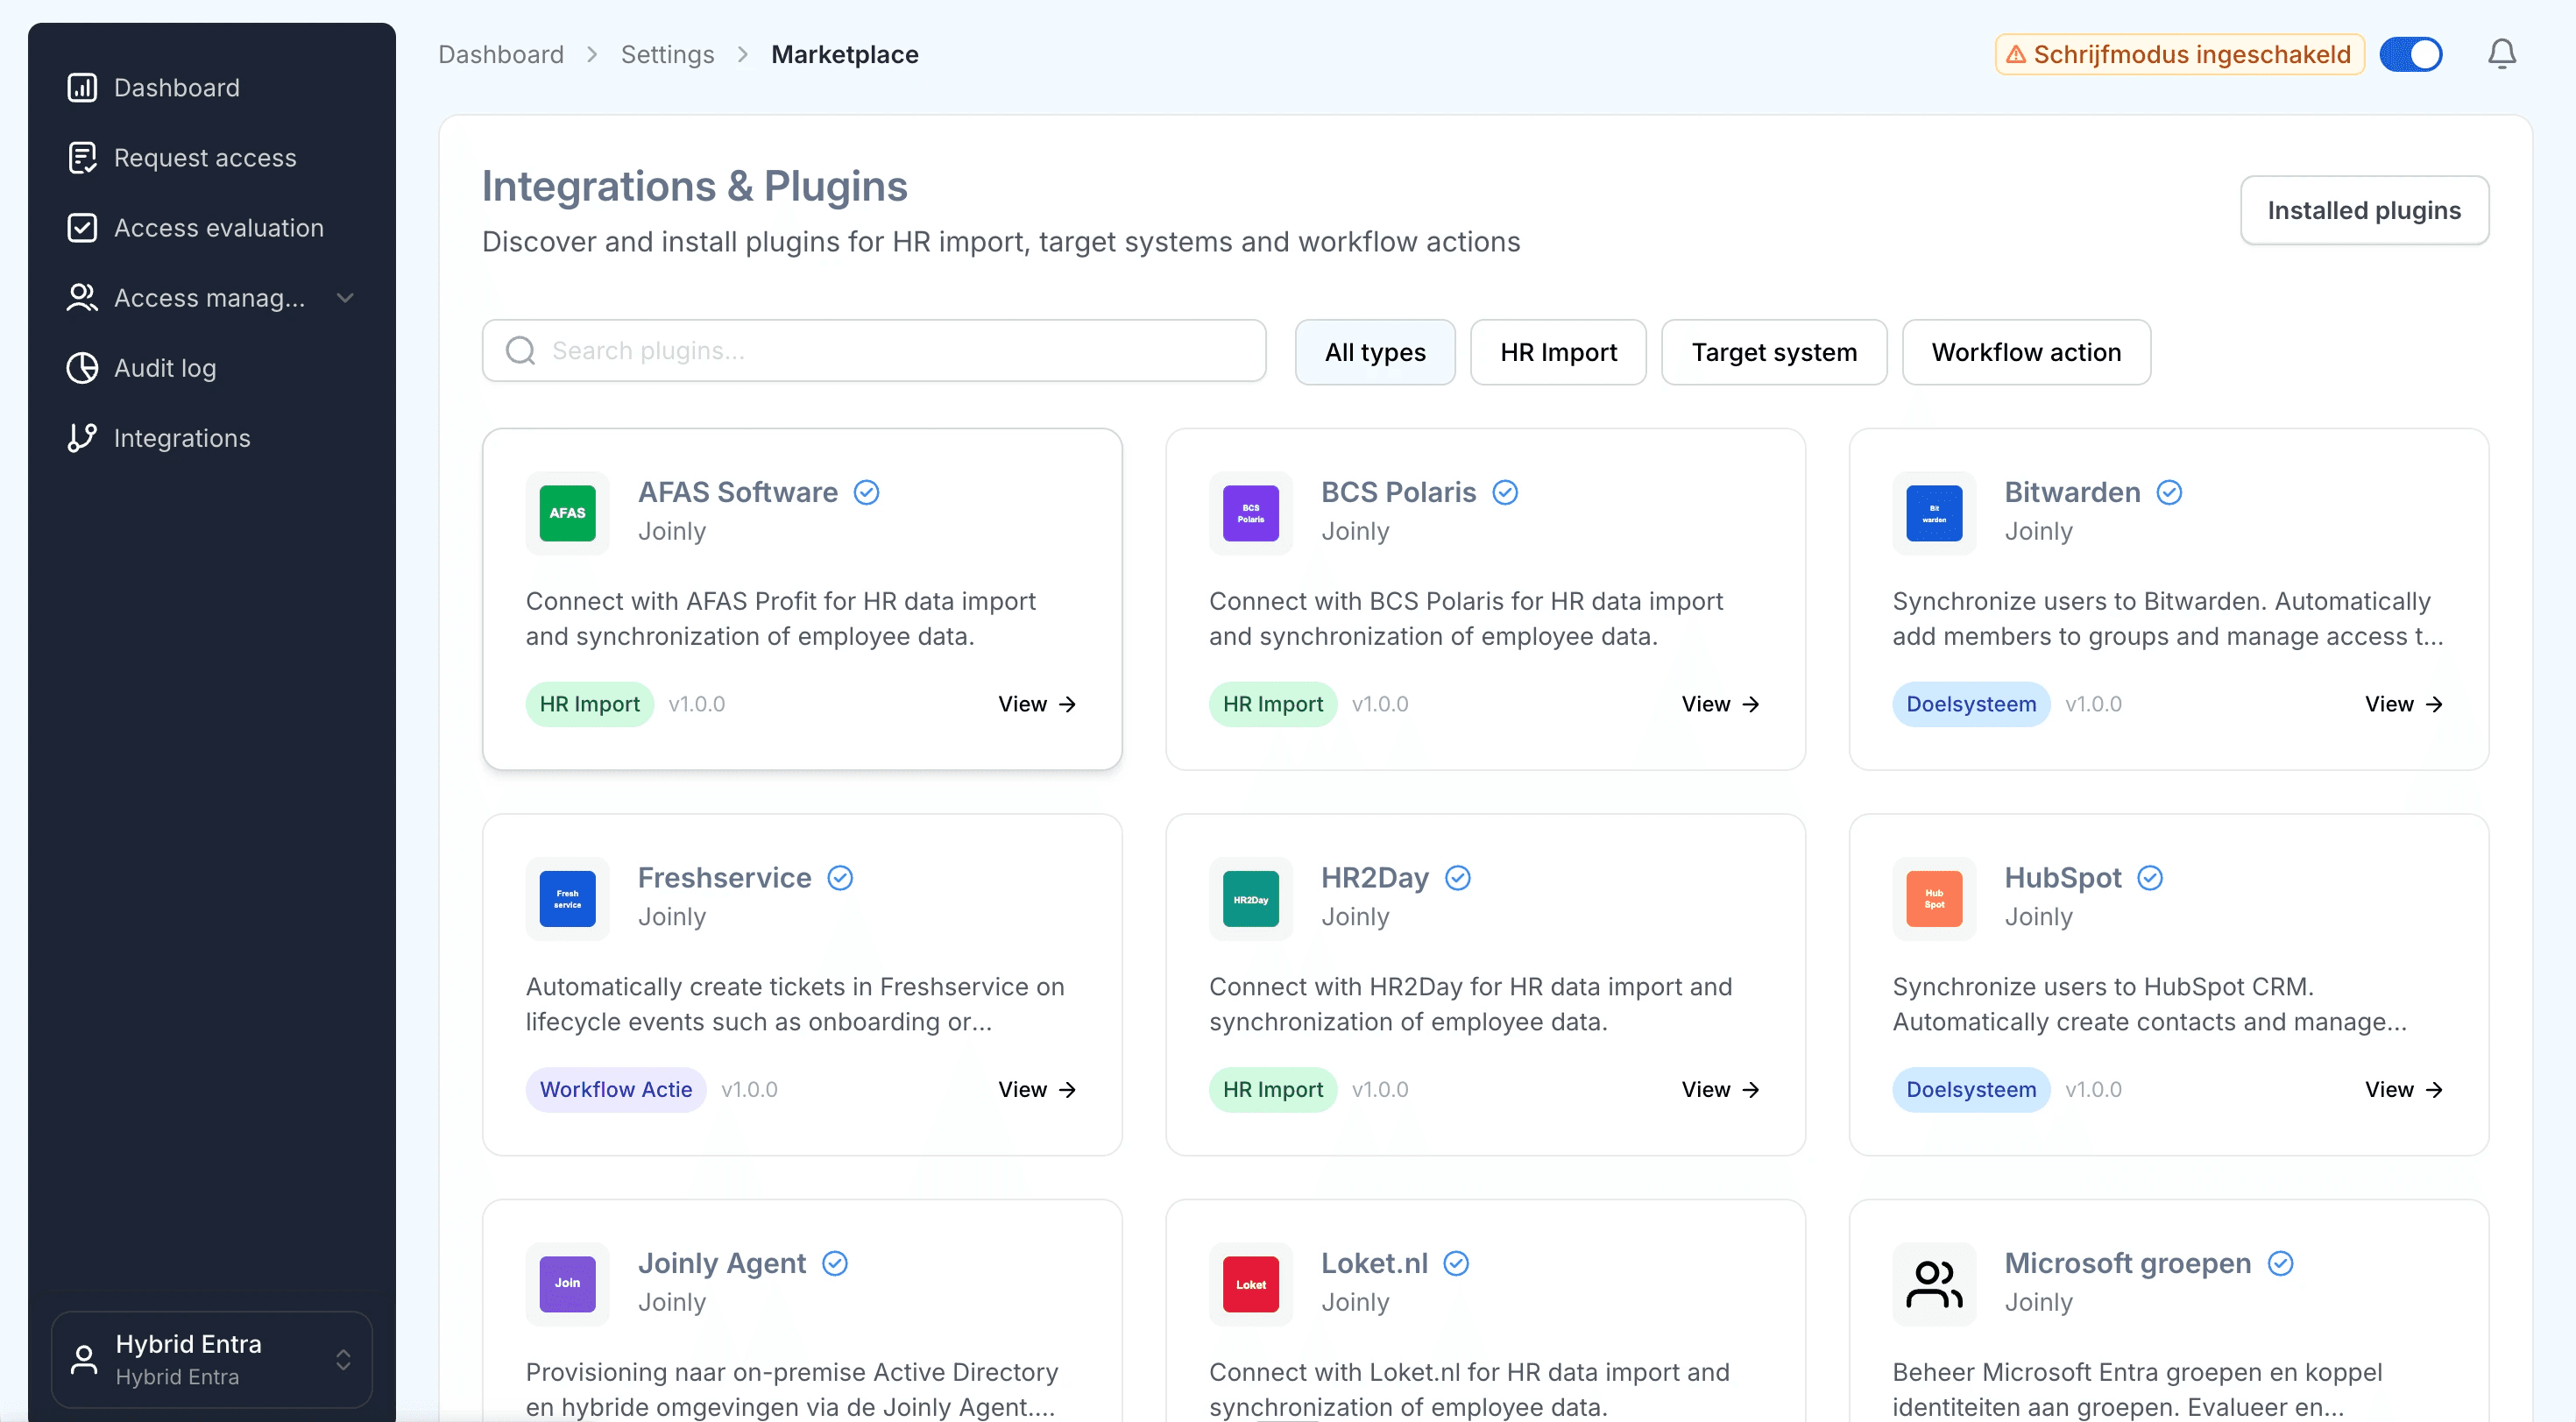
Search the marketplace for the Kenjo integration.
6. Follow the installation wizard
You may be redirected to integrations.joinly.app. Create an account there and enter your Kenjo connection details: your Kenjo API key and the endpoints you enabled. We only ask for the information needed to establish a successful connection with Kenjo. All data is encrypted and stored securely.
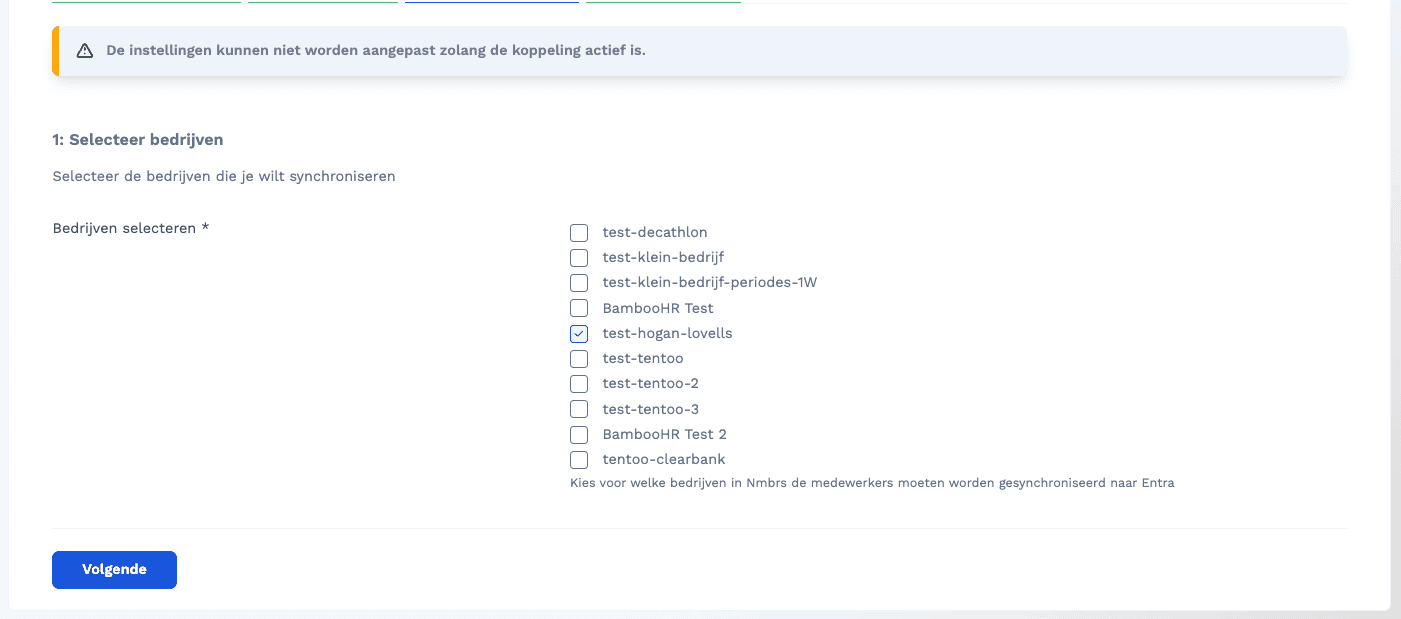
Enter your Kenjo API key and connection details in the wizard.
7. Configure your field mapping
Set up all your field mappings here. Templates support Liquid, so you can build your display name, UPN and other attributes dynamically from Kenjo fields.
Frequently asked questions
How do I map the manager? Reference the manager on the Kenjo employee record in the mapping and Joinly resolves the link to the right manager automatically.
How do I map office, department, team and area? Use them as inputs to your group and licence rules, so Kenjo’s structure drives Entra membership.
How do I prevent duplicate usernames? Use the
generateUniqueUsernamehelper, which falls back to the next pattern when the first one is already taken:{{ generateUniqueUsername: “{firstName}.{prefix}.{lastName}”, “{initials}.{prefix}.{lastName}” }}
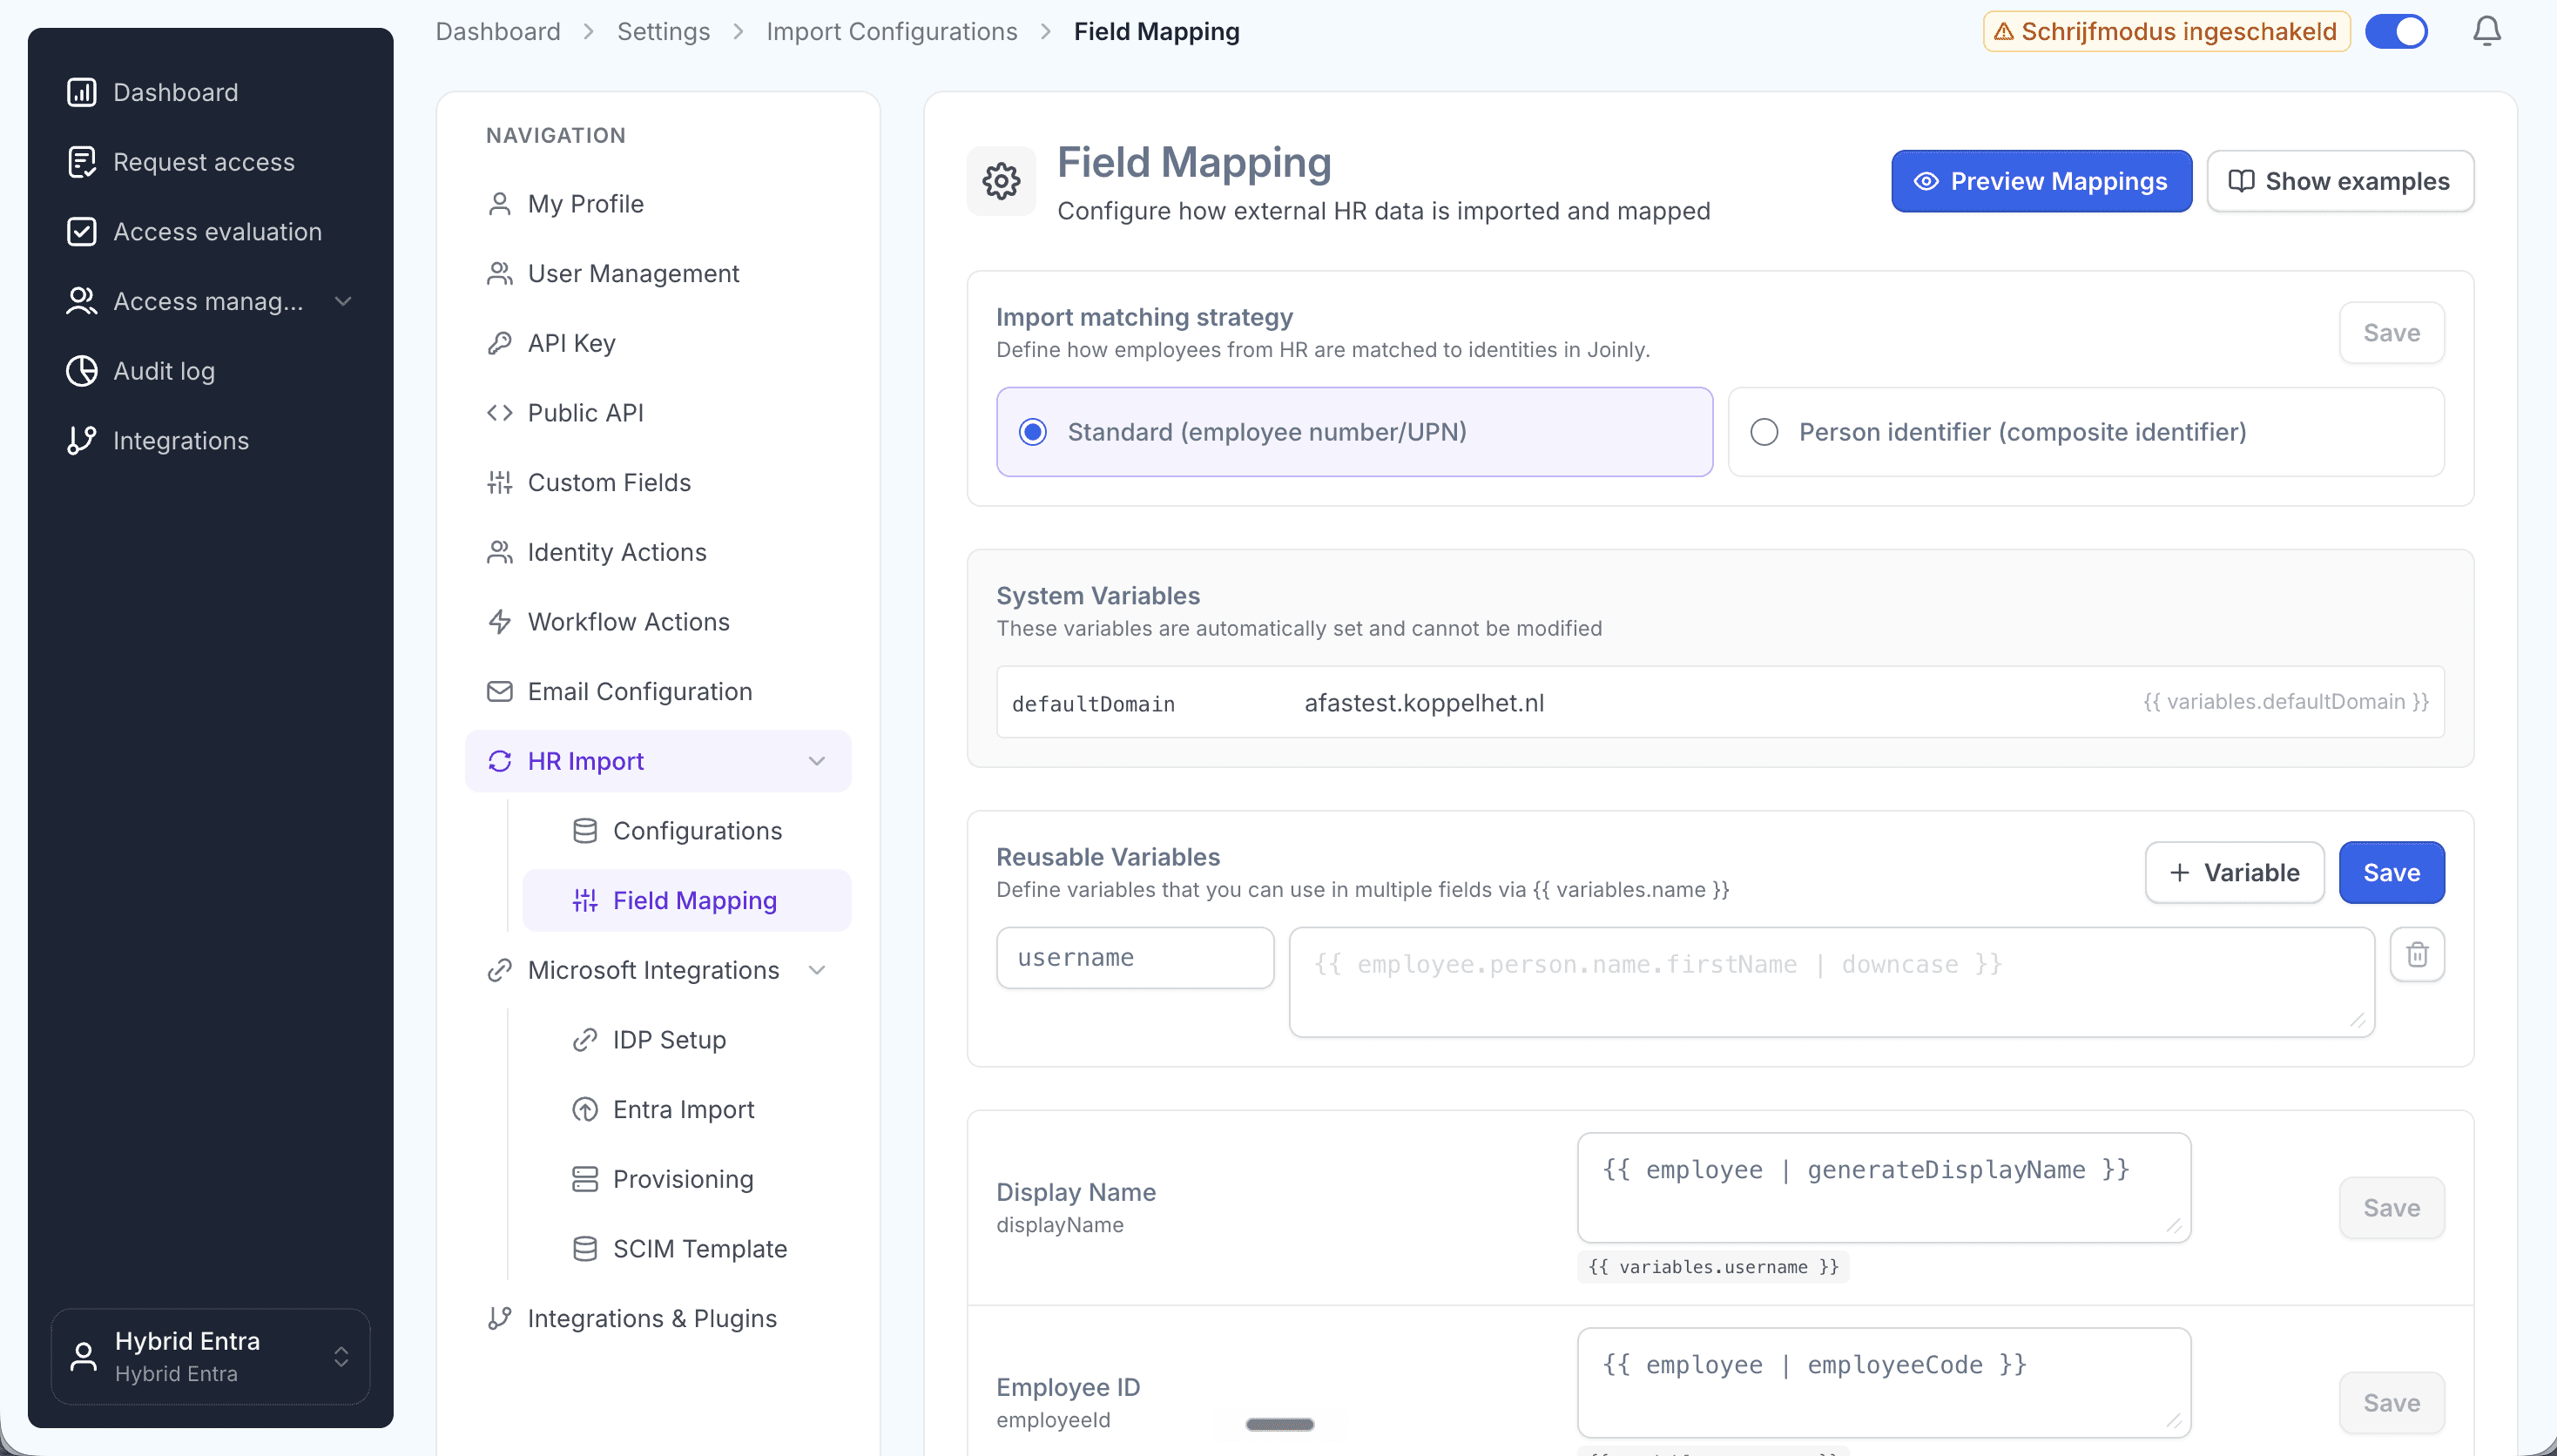
Map Kenjo fields to Entra ID attributes with Liquid templates.
8. Configure the scheduled import
At platform.joinly.app/settings/import-configs, configure how often the import from Kenjo should run.
9. Configure your workflows
Workflows are where Joinly turns each HR change into the right action in Entra ID. Create an onboarding (joiner) and offboarding (leaver) workflow with trigger-based execution, then an Identity updated workflow with a Create/update employee in Entra action so every change in Kenjo flows straight through to Entra ID. Finally, add a threshold workflow with the Entra soft delete action that runs a set period after the leave date (for example 30 days) to retire accounts safely.
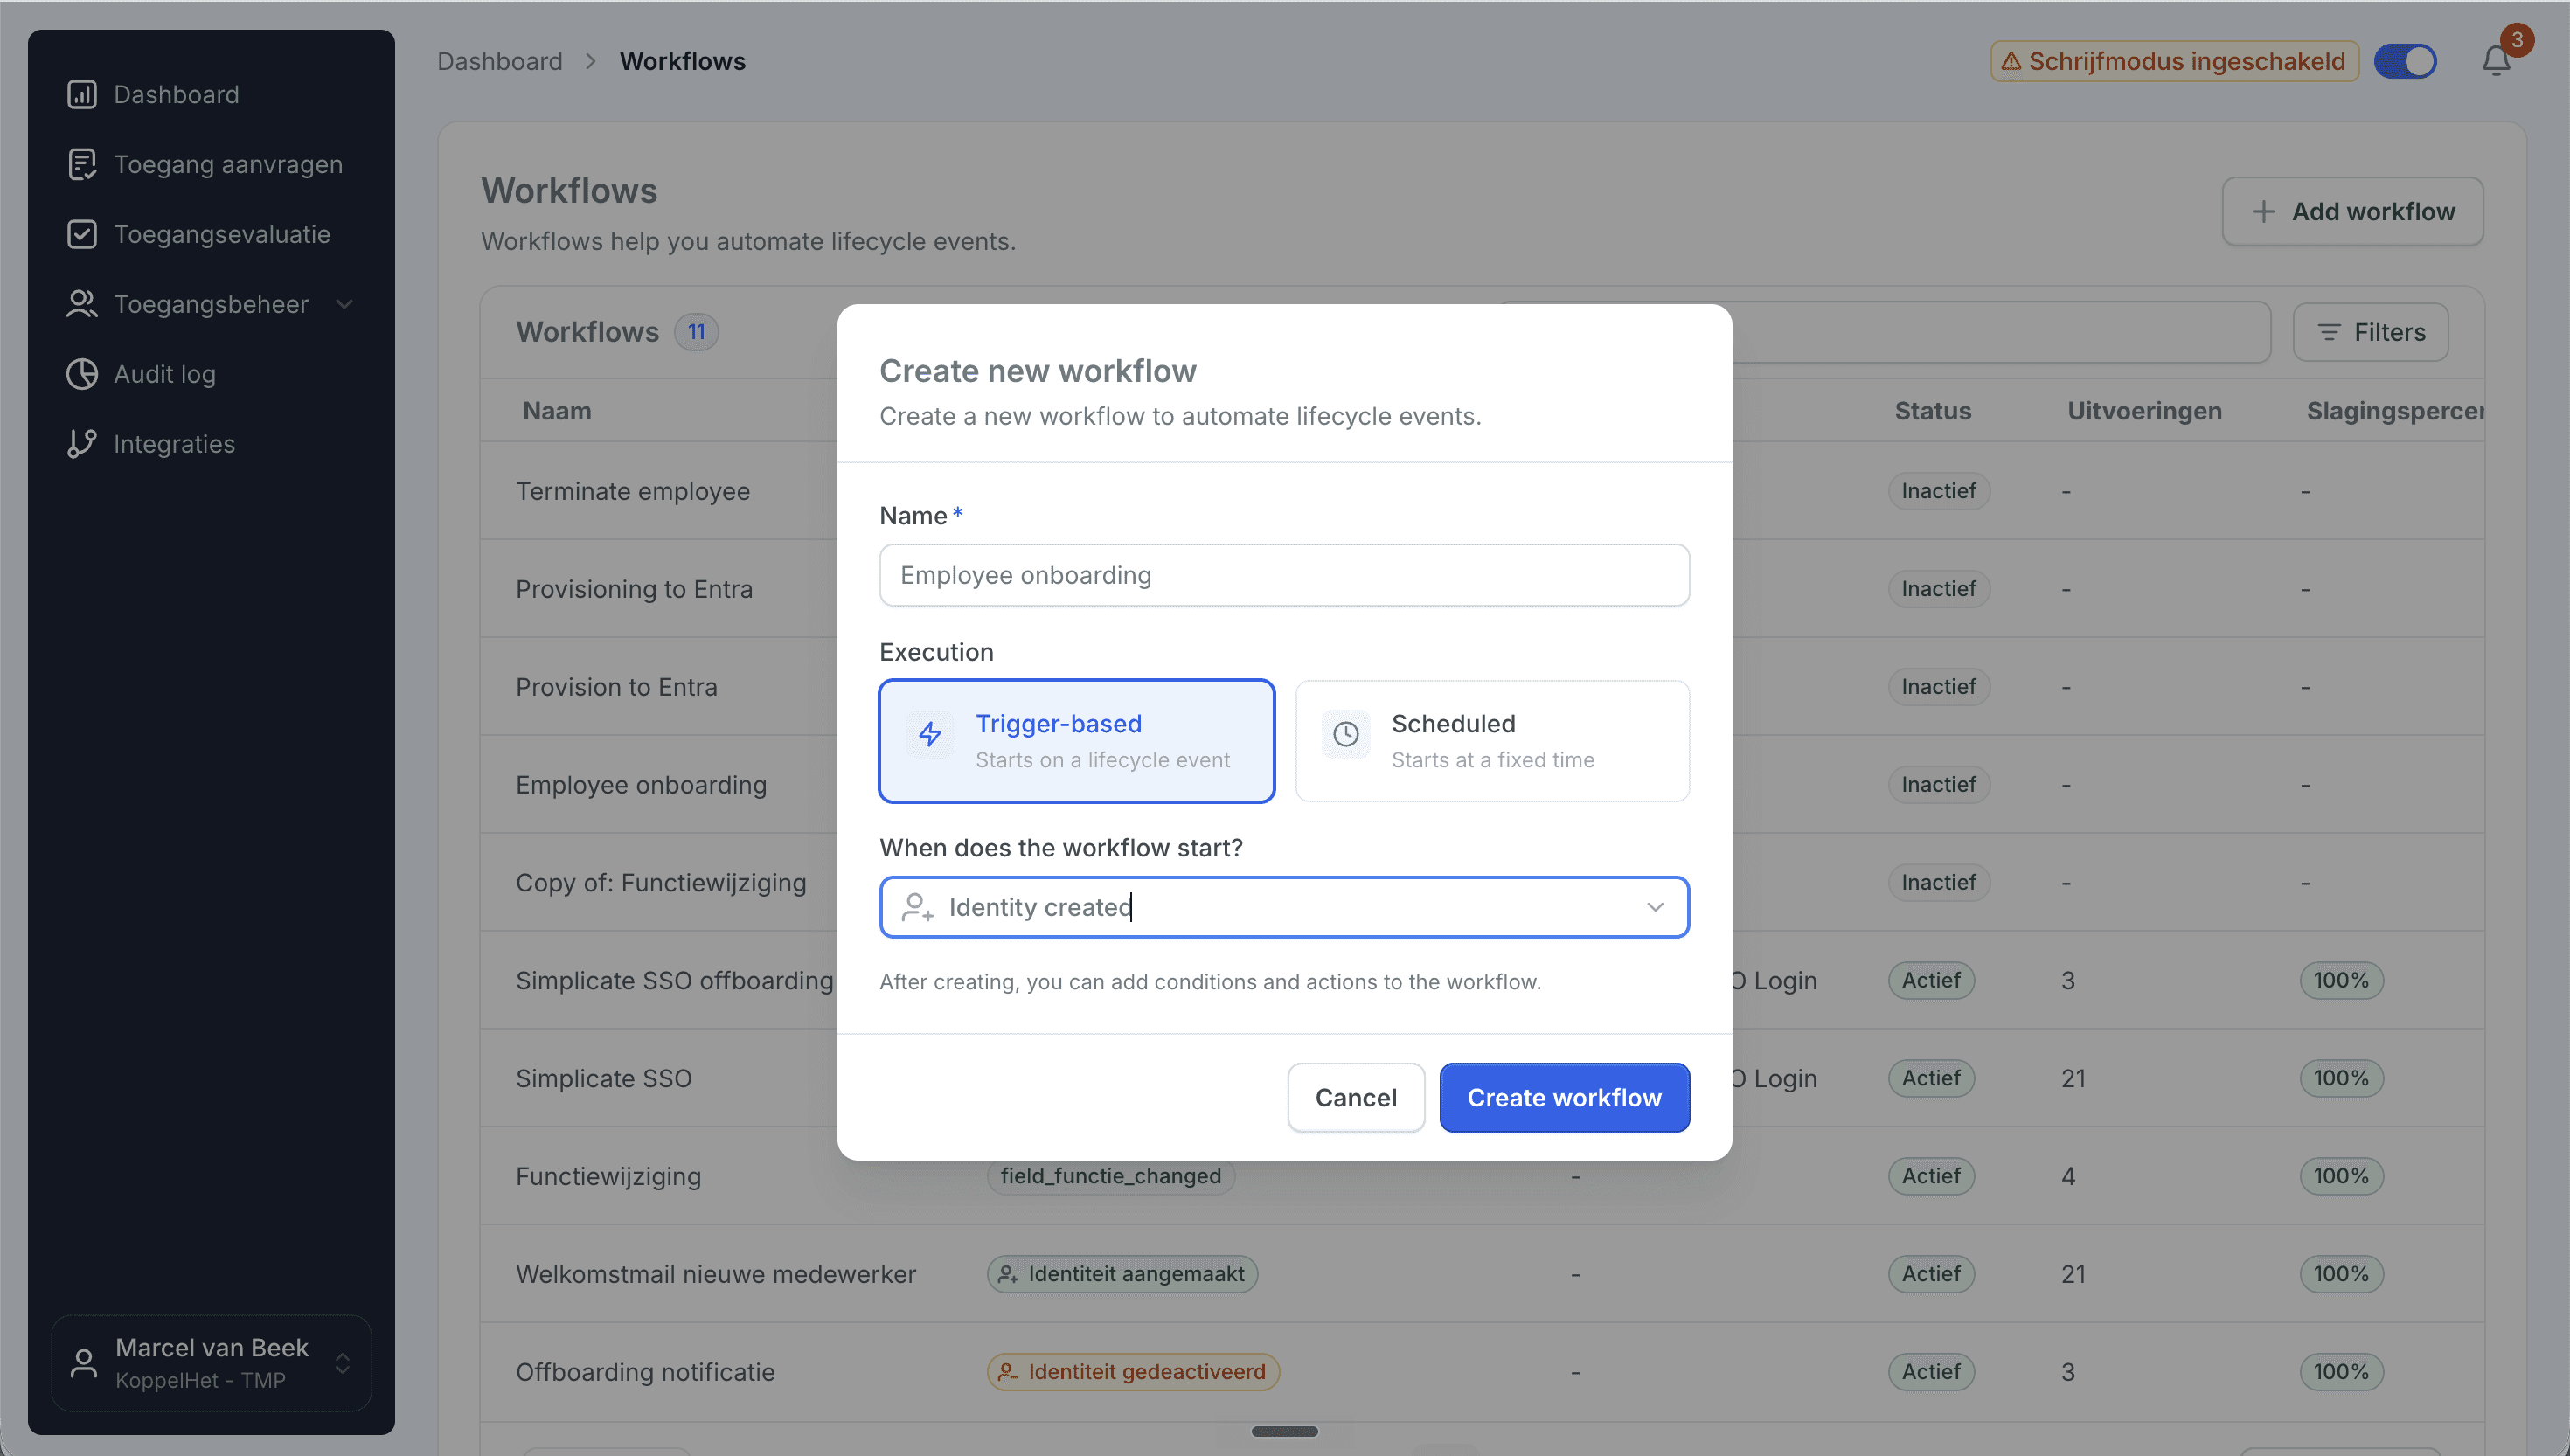
Create a trigger-based onboarding workflow.
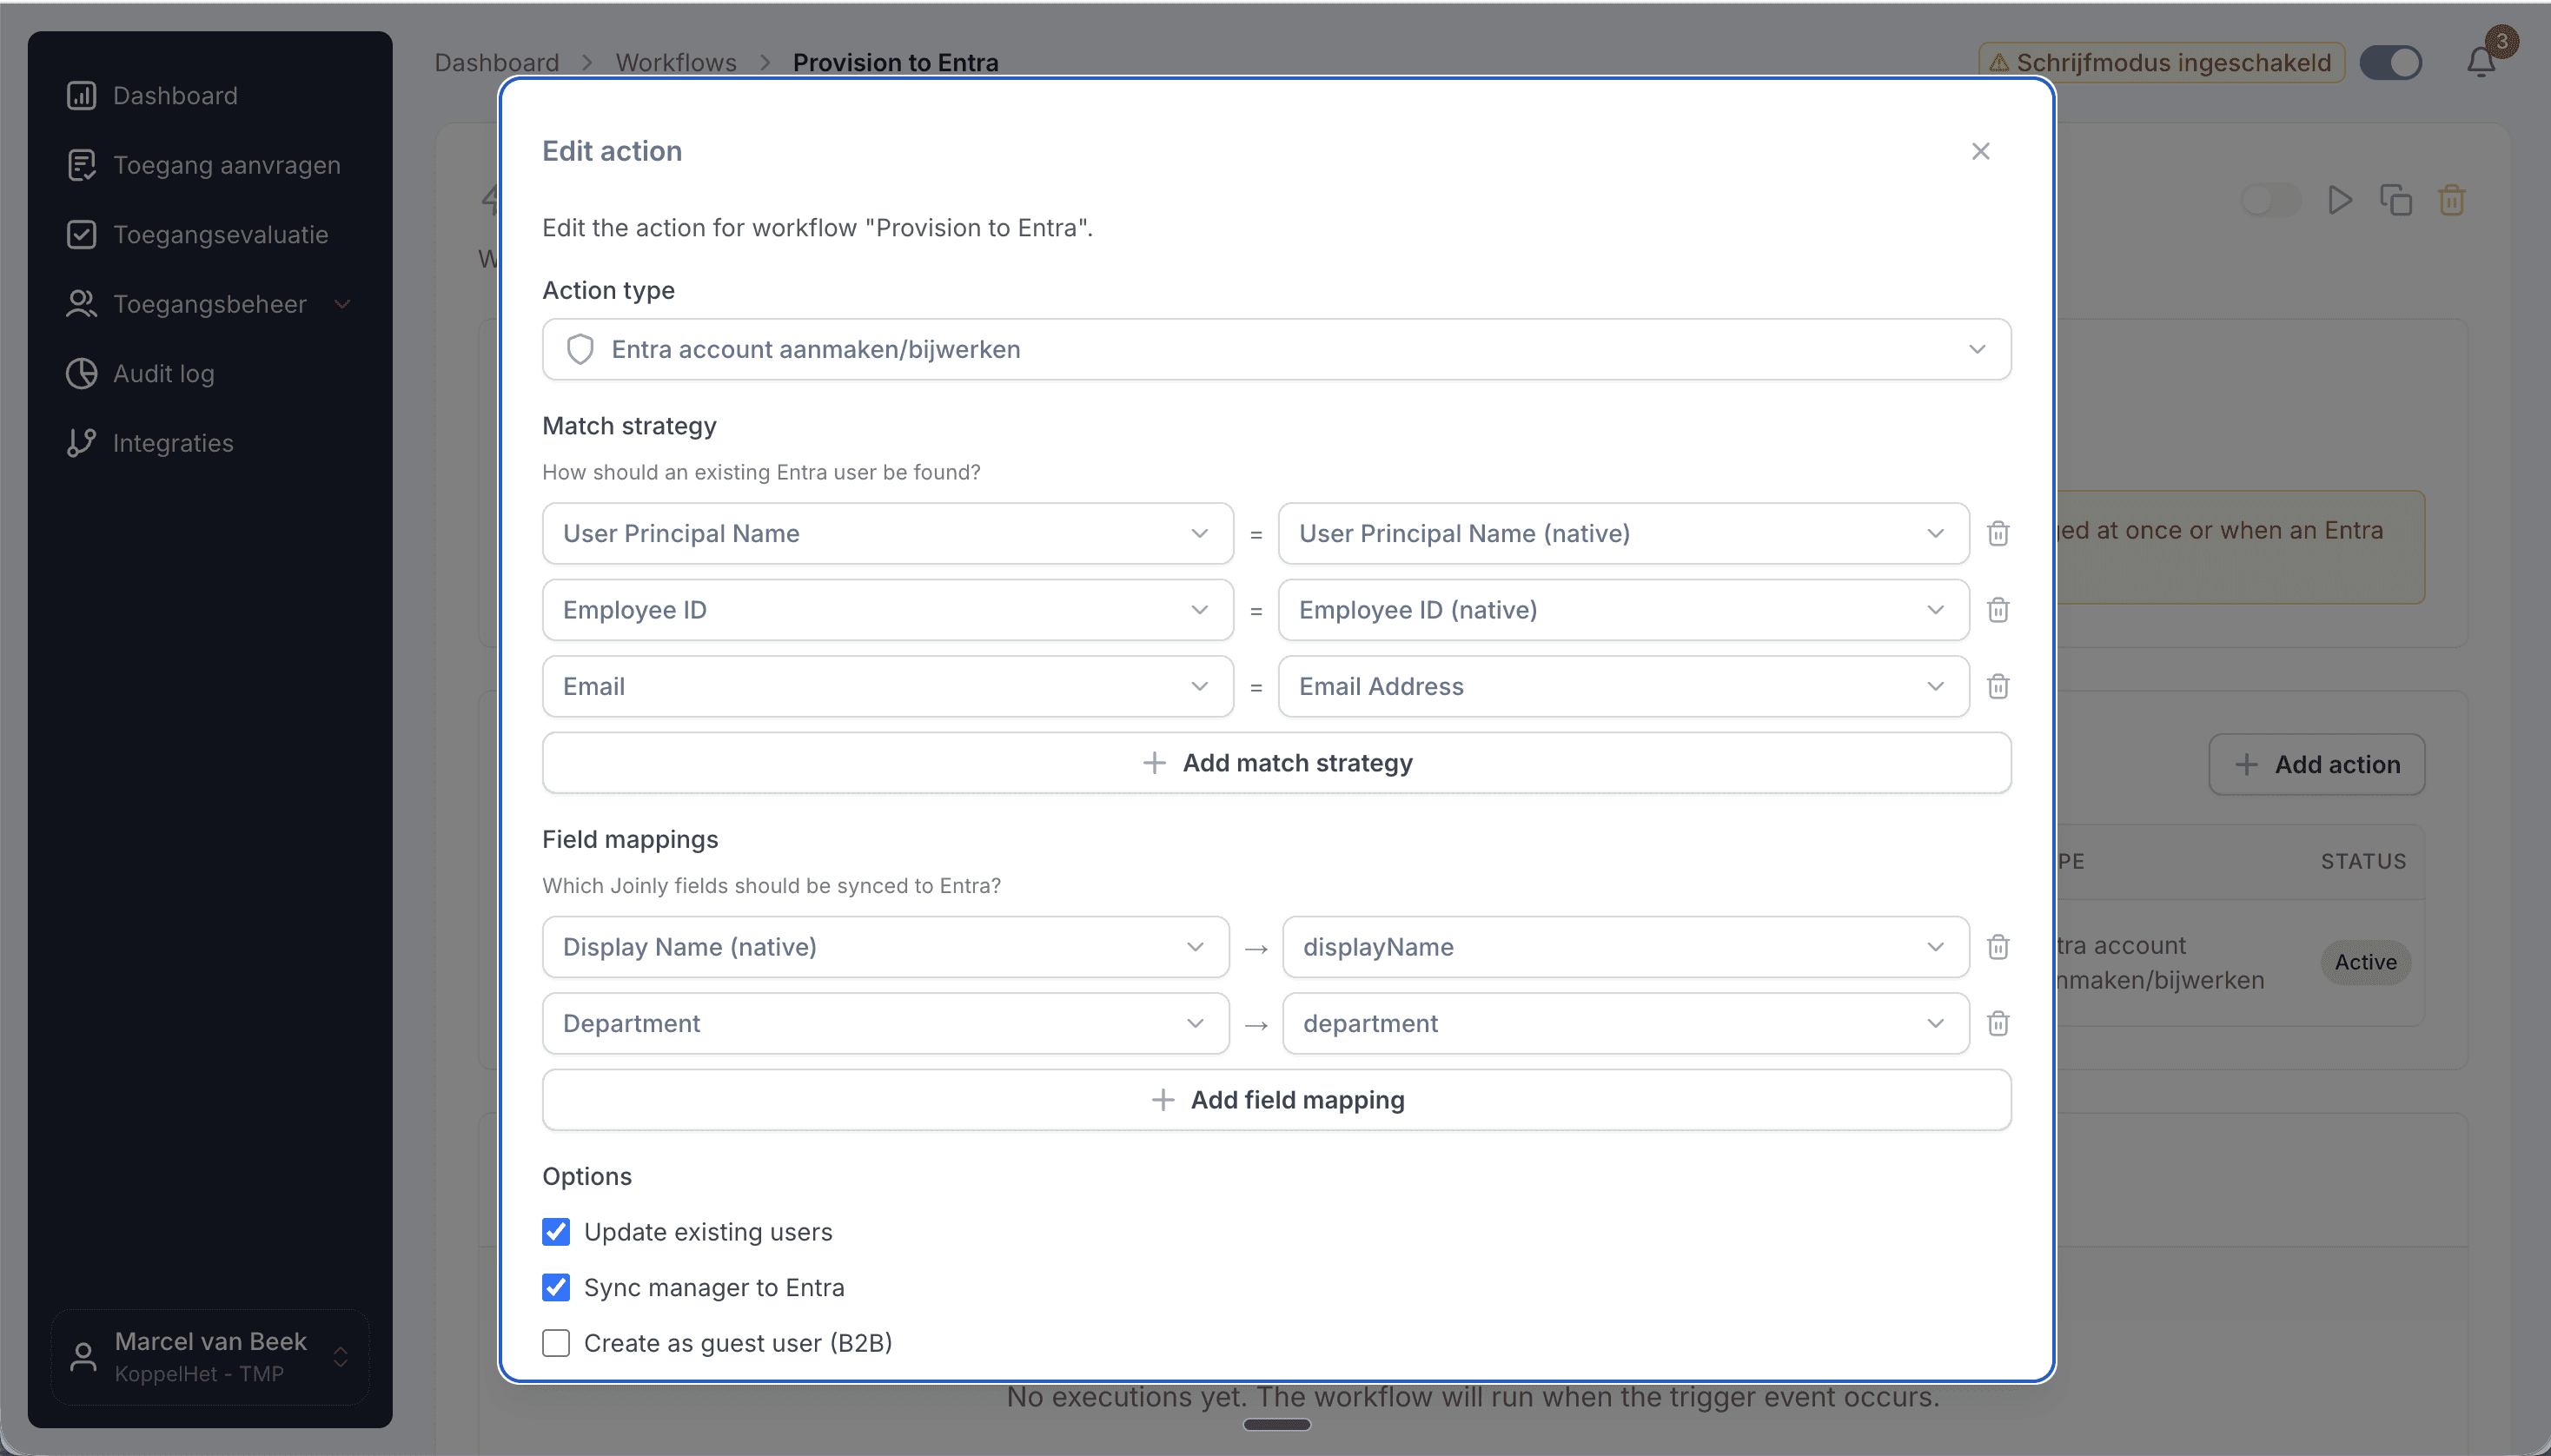
Add the create/update action, then set your matching strategy and field mapping.
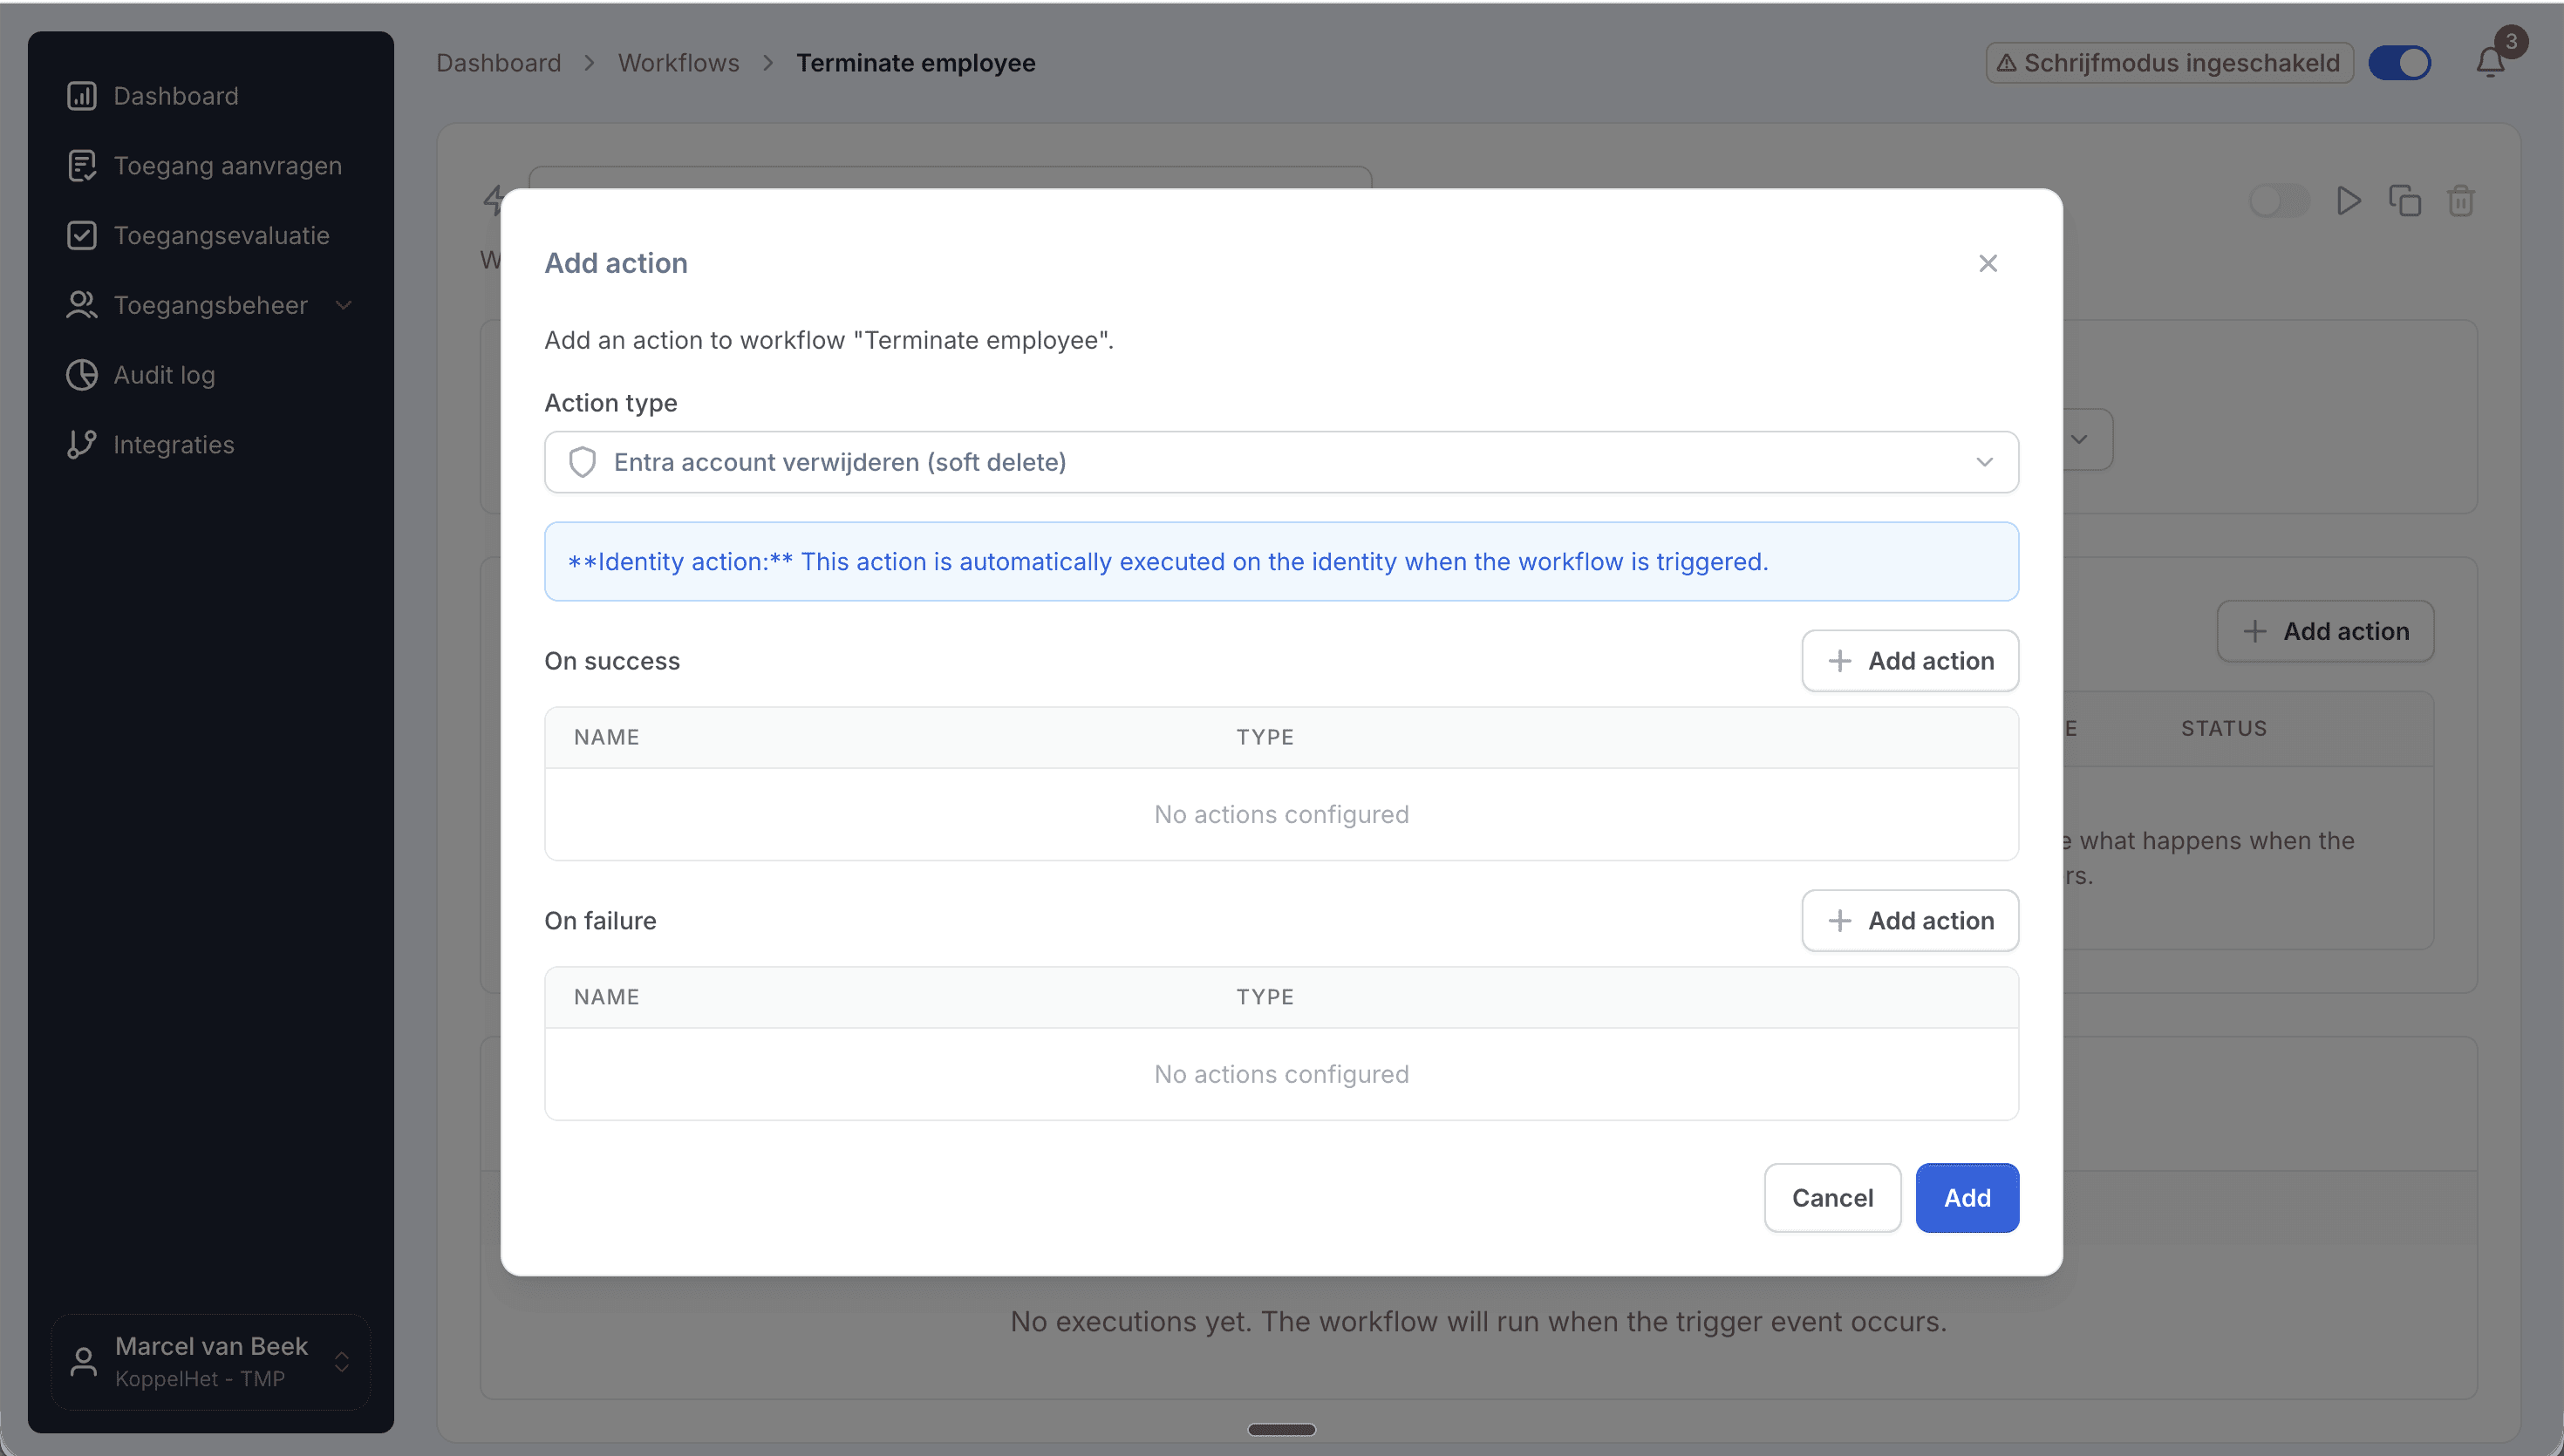
Add the Entra soft delete action to retire accounts safely.
## AD on-premise support
Need to provision to an on-premise Active Directory as well? See our dedicated guide on connecting Kenjo to Active Directory, or contact support at support@koppelhet.nl to request setup of the Joinly AD Agent.
Frequently asked questions
Does the Kenjo to Microsoft Entra ID connection work in real time?
It runs as a frequent sync that updates multiple times per day, so changes in Kenjo reach Entra ID quickly without waiting for a nightly batch.
How does Joinly handle new starters who have no company email?
Joinly generates a unique UPN and display name from your naming rules, with a controlled fallback for duplicate names, so shift and deskless staff get a valid login even though there is no existing address to copy.
Do I need a special Kenjo plan or API access?
Yes. The Kenjo API is enabled under Settings > Integrations and is available on Kenjo’s Connect plan. You generate a scoped API key and grant it the office, department, team, area and employee endpoints that Joinly needs.
Which attributes sync from Kenjo to Entra ID?
Name, email / UPN, department, team, office, area, job title, manager, and start and end date. Additional Kenjo fields can be mapped via Liquid templates.
Does Kenjo have its own Entra provisioning app?
No. Kenjo has no dedicated Entra ID gallery or SCIM provisioning app, so without Joinly you would build and maintain a custom API import yourself. Joinly provides the role-to-group mapping, UPN generation and offboarding logic out of the box and keeps it current as your Kenjo data changes.
Does Joinly also support AD on-premise or hybrid provisioning?
Yes. Joinly has its own AD on-premise agent and also supports the native Microsoft Entra provisioning agent, so you can provision users to your on-premise AD environment as well. See the Kenjo to Active Directory guide.
More than a connector
A standalone Kenjo to Entra ID connection is a good start, but identity rarely stops at one target. Joinly manages the complete chain from joiner to leaver across all your systems, with logging and governance built in. You review the exceptions; Joinly maintains the chain.
Request installation support
Other guides
Frequently asked
Questions about connecting Kenjo to Microsoft Entra ID (formerly Azure AD)
How does Joinly connect Kenjo to Microsoft Entra ID?
The connection reads HR changes at the source (Kenjo API → Entra ID.) Authentication: Kenjo API key (Connect plan), scoped to the org and employee endpoints, over outbound HTTPS. Joinly writes to Entra ID through Microsoft Graph, with its own app registration and application permissions — no synchronisation server, agent or extra infrastructure. If you prefer Microsoft's API-driven provisioning endpoint, Joinly can deliver the same changes as a SCIM 2.0 bulk request instead.
Which HR events does the Kenjo → Entra ID connection handle?
Joiner, mover, leaver. Each event runs the workflow you configured for it: a joiner gets an account, groups and licences before the start date, a mover has the access of the old position removed and the new one added, and a leaver is disabled on the termination date.
Which Kenjo attributes are synced to Entra ID?
Name, email / UPN, department, team, office, area, job title, manager, start and end date. The mapping is configurable per field with Liquid templates, so your own naming convention for the user principal name, display name and e-mail address keeps applying.
How often does Joinly sync Kenjo with Entra ID?
Frequent sync, multiple times per day. The import schedule is yours to set — hourly, daily or weekly at a fixed time — and every run only processes what changed since the previous one.
Will Joinly overwrite the accounts that already exist in Entra ID?
No. Joinly first imports your existing directory and matches those accounts to the employees from Kenjo. Existing accounts are recognised and adopted rather than created twice. Which matching strategy applies — user principal name, e-mail address, employee ID or a person identifier — is a setting.
Can I try this without anything being written?
Yes. Run the import as a dry run and you get an Excel export of exactly what would happen. You can also leave the connection in read-only mode, where Joinly calculates everything but writes nothing, and set thresholds for how many creations, activations and deactivations one run may produce before it is blocked for approval.
Is Kenjo a ready-made connector in Joinly?
Yes. Kenjo is a ready-made HR connector in Joinly: you enable it, enter the details of your Kenjo environment and Joinly reads the employees from there. Nothing has to be developed on either side.
What happens when someone has more than one contract in Kenjo?
Joinly recognises that it is one person and decides which employment leads for the account, the manager and the department. You do not get two accounts for the same employee, and when one contract ends the account is only disabled when the last active employment ends.
Do I need a Microsoft Entra ID P1 or P2 licence for this?
Not for the Microsoft Graph path: Joinly uses its own app registration and the permissions you grant it. Microsoft's API-driven inbound provisioning endpoint, which Joinly can also target with SCIM bulk requests, follows Microsoft's own licensing for that feature.
Does the Kenjo → Entra ID connection support NIS2 and ISO 27001?
ISO 27001, NIS2-ready, GDPR (EU data centre). Every mutation lands in the audit log with its source — HR import, manual, from Entra, by the system or through an API key — and a link to the workflow that caused it. That is the evidence an auditor asks for when they want to know who had access to what, and why.
More on Kenjo
Everything Joinly publishes about Kenjo: the other installation guide, how the connection compares with Microsoft's own provisioning, what offboarding looks like, and the SCIM route.
Zien wat Joinly voor jouw organisatie doet?
Start direct met een gratis proefversie of neem contact op voor advies over jouw HR- en Microsoft-omgeving.