
Loket → On-premise Active Directory (AD DS)
Connect Loket to Active Directory (on-premise)
When someone joins, moves or leaves in Loket, you want that change reflected in your on-premise Active Directory without anyone touching it by hand. To connect Loket to Active Directory, Joinly reads each HR change through the Loket.nl REST API and applies it to your domain through the Joinly AD Agent — a lightweight connector that runs inside your network. Loket stays your source of truth; Joinly is the engine that keeps every account in the right OU, accurate and traceable.
Key takeaways
Loket stays your source of truth; Joinly applies every joiner, mover and leaver to on-premise Active Directory automatically.
The Joinly AD Agent runs inside your network and needs only an outbound HTTPS connection — no inbound ports and no domain controller exposed to the internet.
Joinly maps Loket’s werkgever and administratie structure to the right AD security groups and target OUs, and builds the sAMAccountName, UPN and distinguished name from your own rules — which Loket, being payroll-first, does not supply.
One persoon can hold multiple dienstverbanden, so Joinly keeps a single AD object driven by the right active employment and places it in the correct OU on the start date.
Every action is logged for a complete audit trail, aligned with NIS2 and ISO 27001 — and the same setup extends to a hybrid Entra ID environment.


Quick facts
Source system | Loket.nl (salaris- en HR-administratie) |
Target system | On-premise Active Directory (AD DS) |
Connection method | Loket.nl REST API (OAuth 2.0) → Joinly AD Agent → Active Directory |
Agent requirement | Domain-joined Windows server with a GMSA, outbound HTTPS (443) only |
Supported events | Joiner, mover, leaver (incl. rehire, multiple dienstverbanden) |
Synced attributes | Name, sAMAccountName, UPN, mail, department, job title, manager, werkgever, distinguished name / OU, start and end date |
Real-time or batch | Frequent sync, multiple times per day |
Compliance | ISO 27001, NIS2-ready, GDPR (EU data centre) |
Liever in het Nederlands? Loket koppelen met Active Directory (on-premise)
How does Joinly sync Loket to Active Directory?
Joinly reads each HR change in Loket in the cloud through the REST API, then hands the action to the Joinly AD Agent inside your network, which makes the change in Active Directory. Loket holds the authoritative werknemer and dienstverband record; the agent is the only component that touches your domain.
Joiner. The salarisadministrateur enters the new werknemer and dienstverband in Loket. Joinly reads the new records, determines the role from department, function and werkgever, and instructs the AD Agent to create the user in the correct OU, build the sAMAccountName and UPN from your rules, and add the right security groups — timed to the start date of the dienstverband.
Mover. When someone changes function, department or werkgever, Joinly tells the agent to move the user to the matching OU, swap security-group membership and update attributes. Access that no longer fits the new position is removed, so permissions stay aligned with the actual job.
Leaver. On the end date of the dienstverband, Joinly instructs the agent to disable the AD account and optionally move it to a disabled-users OU. Because a persoon can hold more than one dienstverband, an account is only disabled when the last active employment ends.
Example: A hospitality business runs Loket for payroll and an on-premise AD across a hotel and two restaurants. It hires a front-office employee with a start date next Monday. Joinly reads the new dienstverband through the API, and on Monday morning the AD Agent creates the user in the Hotel > FrontOffice OU, sets the sAMAccountName to a unique pattern, and adds the Reception group. When that employee later picks up shifts at one of the restaurants under a second dienstverband, the agent keeps a single AD object and adds the extra group rather than creating a duplicate.
What manual AD account management costs
Without automation, every account starts as an email from the salarisadministratie that an admin works through in Active Directory Users and Computers by hand — creating the object, choosing the OU, building the sAMAccountName, adding groups. Loket exposes a clean REST API, but on its own it offers no OU logic, no role-to-group mapping and no UPN rules, so the decisions still fall to people.
Onboarding delays. New joiners wait for an AD account and group access while a request sits in a queue, losing productive days in their first week.
Permissions that don’t keep up (privilege creep). When movers change function or werkgever, old security-group membership often stays attached, so people accumulate rights they no longer need.
Forgotten offboarding. Accounts that aren’t disabled on time are a security and audit risk — and with multiple dienstverbanden it is easy to disable an account while another contract is still active.
Joinly vs. a scripted Loket-to-AD integration
Loket’s REST API is a clean source, but writing to on-premise AD from it means building and maintaining your own scripts or an iPaaS flow — and that stops short of the part that actually decides access. Here’s how the two compare for a Loket-driven AD setup.
Joinly AD Agent | Scripted Loket API → AD flow | |
|---|---|---|
Source | Reads the Loket REST API directly over OAuth 2.0 | Reads the Loket REST API |
OU placement | Rule-based on werkgever / administratie / department | Hard-coded container; you maintain the logic |
Role-to-group mapping | Built in, rule-based | Not available out of the box; scripted by hand |
UPN / email generation | Generated from your rules (Loket has no native UPN) | You build and maintain the rules yourself |
Multiple dienstverbanden | Keeps one AD object driven by the right employment | Wrong employment or duplicate object can result |
sAMAccountName / UPN rules | Custom transformation with uniqueness fallback | Hand-rolled, easy to collide or truncate |
Audit trail | Per-action logging tied to the HR source | Whatever you log yourself |
Watch-outs when connecting Loket to Active Directory
A few Loket-specific details decide whether this connection stays reliable at scale.
sAMAccountName uniqueness and length. AD limits the sAMAccountName to 20 characters and it must be unique across the domain. Loket doesn’t supply one, so Joinly builds it from your rules with a fallback pattern — duplicate names never produce a collision or a truncated, unreadable login.
OU placement from Loket structure. Werkgever, administratie and department don’t map one-to-one to your OU structure. Joinly builds explicit rules that place each user — and move them on a transfer — into the correct OU.
Accountant-administered provider structure. One administratiekantoor (provider) in Loket can span several client werkgevers. Joinly pins the connection to the werkgever(s) and administratie(s) that belong to your domain, so only the intended population is provisioned to AD.
Multiple dienstverbanden per person. A single persoon can hold more than one dienstverband. Joinly applies rules to keep a single, stable AD object driven by the primary employment, so a second contract adds groups rather than creating a duplicate account.
Service-account permissions. The agent acts under a service account with delegated rights. Joinly works with least-privilege delegation scoped to the target OUs, so the agent can create, move and disable users without domain-admin rights.
Joinly handles each of these by default with custom mapping and transformation.
Always audit-ready
Every account action the Joinly AD Agent performs is logged in the Joinly cloud: who was affected, when it happened, which OU and groups changed and which Loket change triggered it. For NIS2 that matters directly: access can be traced back to an authorised HR source rather than an ad-hoc request. Joinly is ISO 27001 certified, runs in an EU data centre in Amsterdam, applies least-privilege by default, and is built to meet NIS2 and ISO 27001.
Example case
Take a hospitality business with around 180 staff across a hotel and two restaurants, payrolled in Loket but still living in an on-premise Active Directory for its front-office, reservations and kitchen systems. Every new receptionist, server or kitchen hand starts as an email from the salarisadministratie that IT processes by hand in AD — creating the object, choosing the OU, building the login, adding groups. With high seasonal turnover and staff picking up shifts across venues under a second dienstverband, the queue never empties and new joiners often wait until their second shift for an account.
Connect Loket to Active Directory with Joinly and that work disappears. The Joinly AD Agent creates each user in the right OU on the start date, builds a unique sAMAccountName, adds the correct security groups, moves people on a transfer and disables accounts on the end date of the dienstverband with a 30-day grace window — all driven by the HR change in Loket, and keeping one AD object even when someone works across two venues.
“An account is simply ready in the right OU when the new server walks in, people who work across venues keep one login, and we can show the auditor exactly which Loket change created every bit of access.” — Head of IT, hospitality business
The outcome this setup is designed for: onboarding drops from days to zero touch, duplicate accounts from second contracts are eliminated, and the team can walk into its next NIS2 assessment with a complete, source-backed audit trail.
Installation guide
Follow these steps to connect Loket to your on-premise Active Directory with Joinly. Most of the setup happens in the cloud platform; the only local component is the lightweight Joinly AD Agent, which you install on a domain-joined server.
1. Create your account
Go to platform.joinly.app and create your account.
Note: charges may apply for using the platform after the trial period ends.
Sign up at platform.joinly.app to get started.
2. Find the Loket integration in the Joinly marketplace
Open the Joinly marketplace and search for the Loket integration.
Don’t see your system listed? Get in touch at support@koppelhet.nl and we’ll help you out.
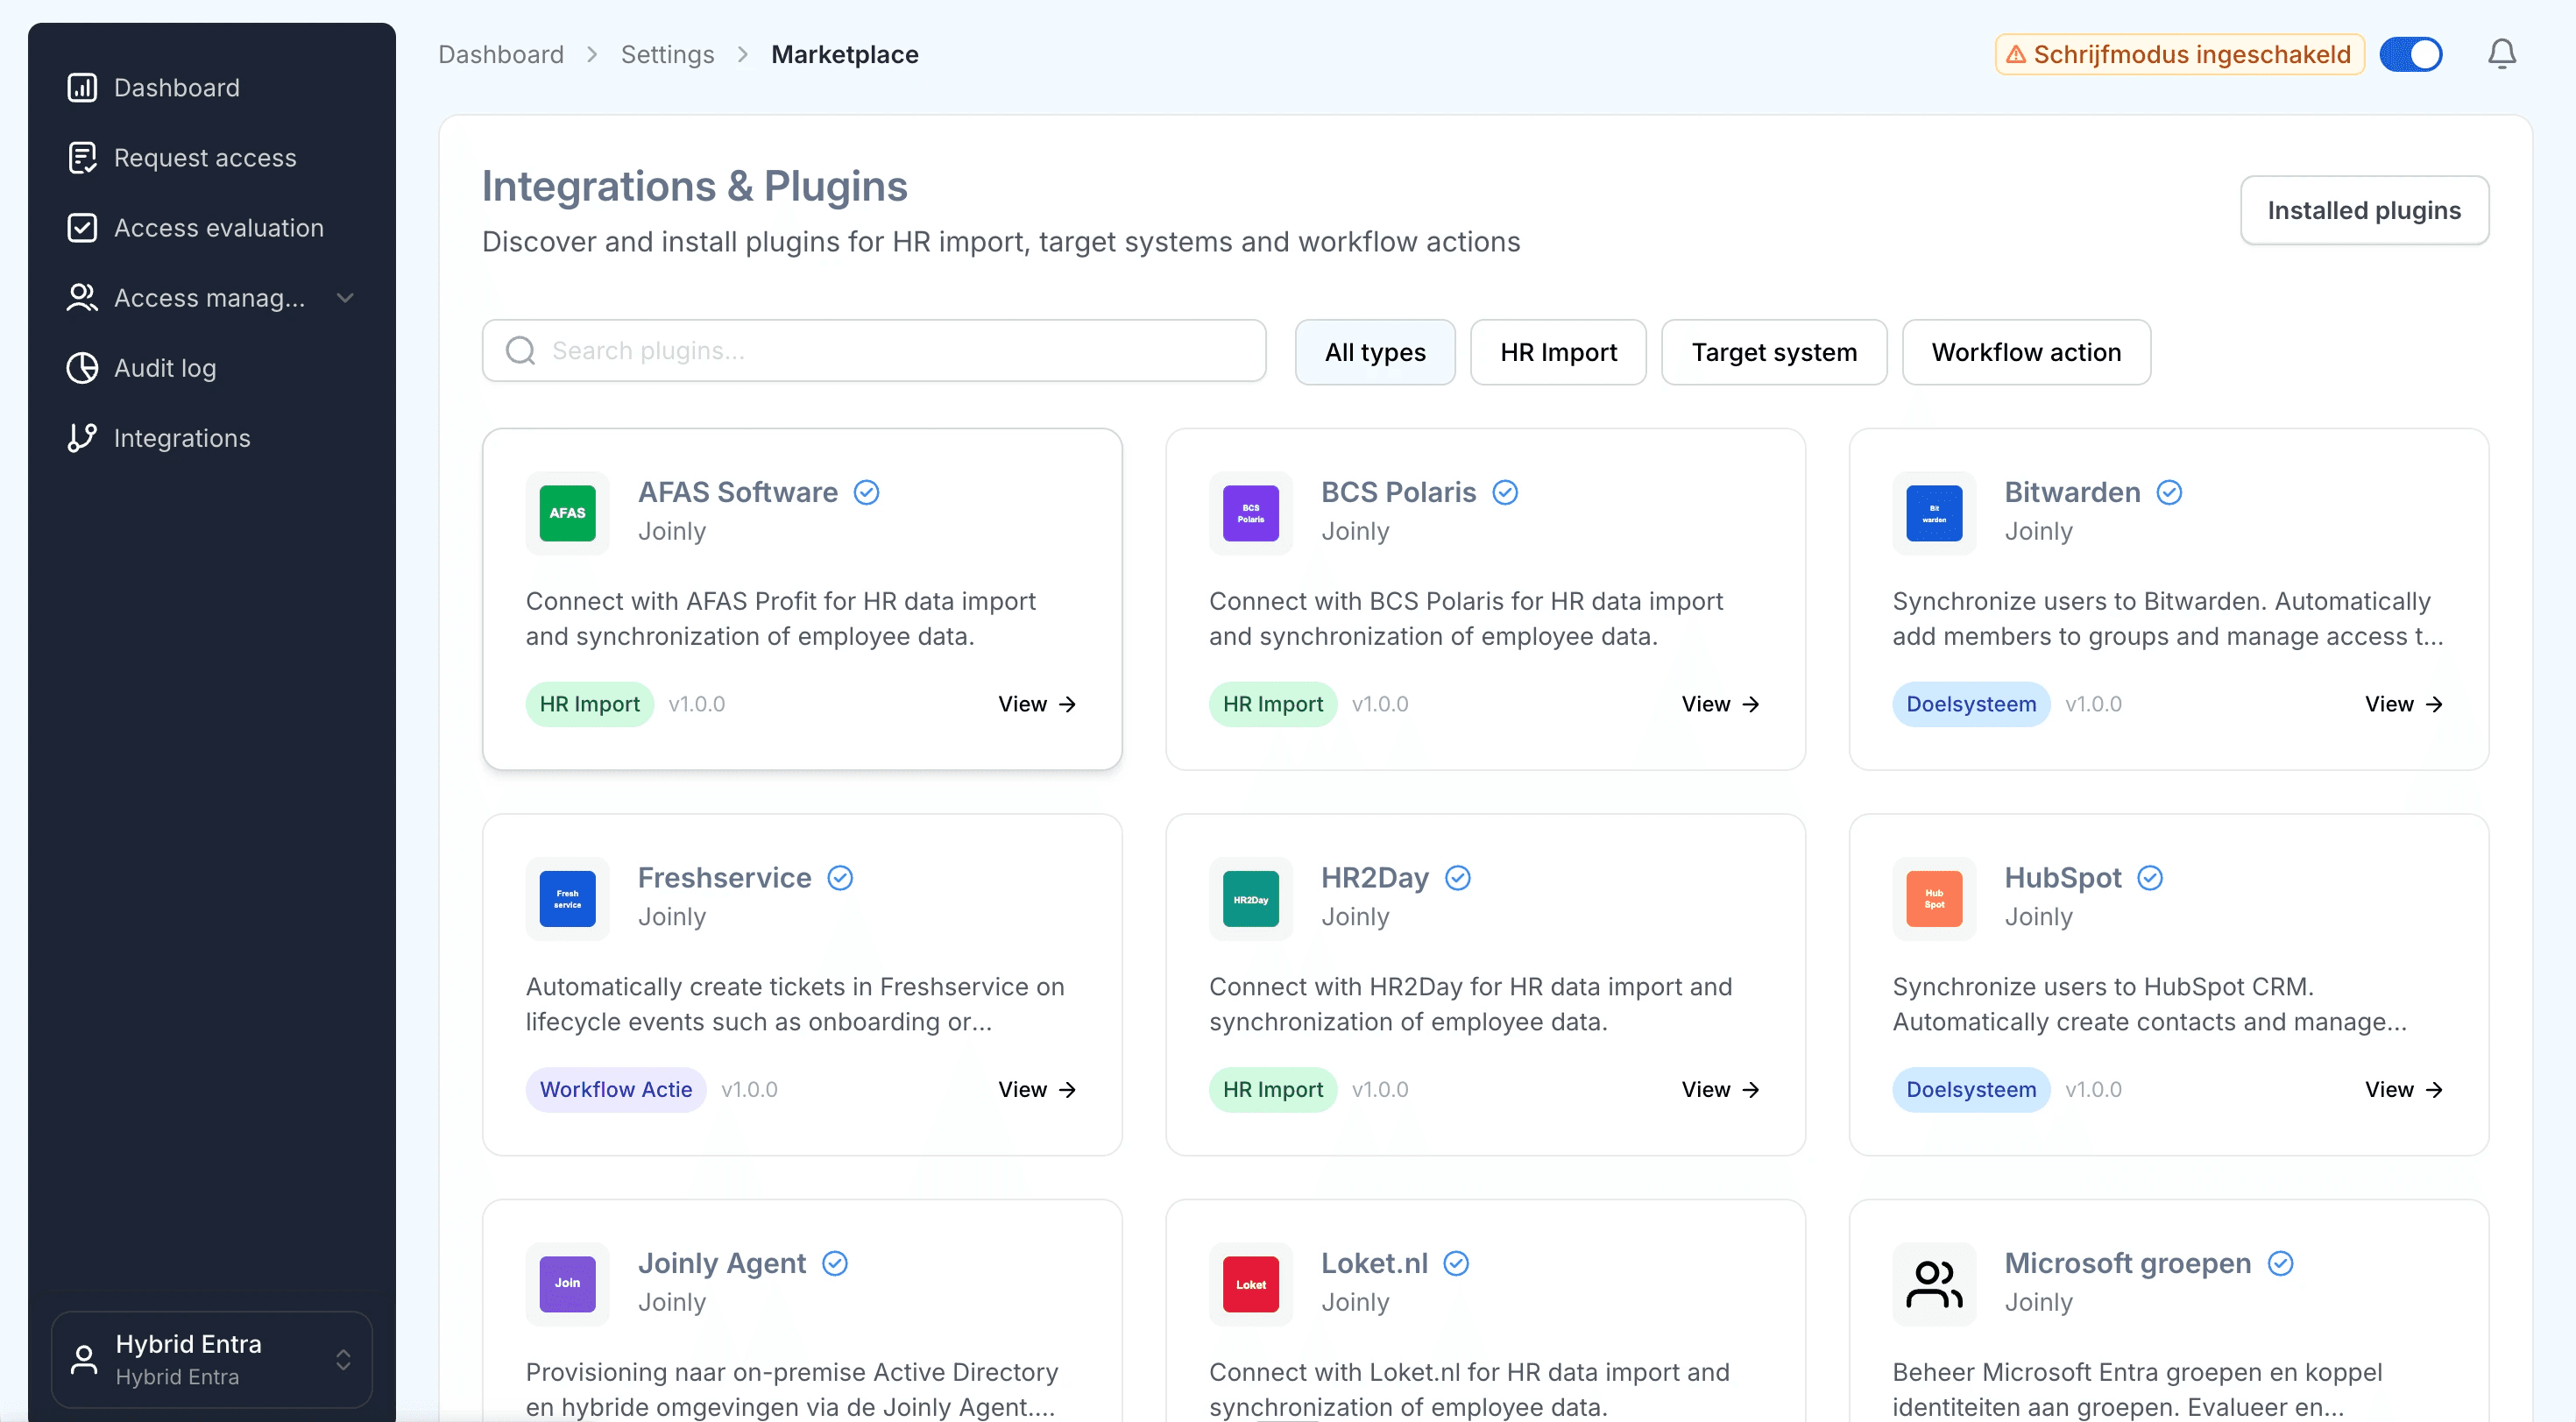
Search the marketplace for the Loket integration.
3. Follow the installation wizard
You may be redirected to integrations.joinly.app. Create an account there and authorise Joinly against the Loket.nl API over OAuth 2.0: sign in with your Loket account and consent to the connection, then pick the werkgever(s) and administratie(s) whose people you want to provision. All data is encrypted and stored securely.
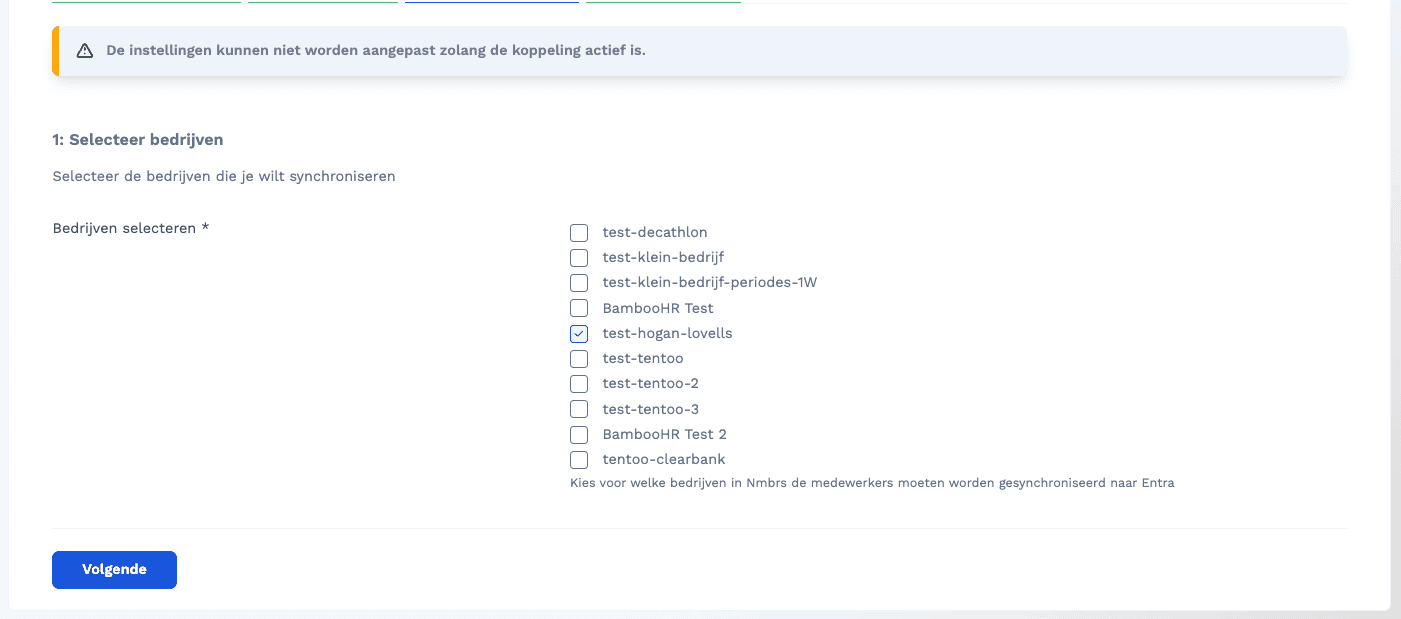
Authorise Joinly against the Loket API with OAuth and pick your werkgever and administratie.
4. Download the Joinly AD Agent
In the platform, go to Workflows → Select a workflow → Add action → Select ‘Provisioning via Agent’ and download the installer. The agent is a lightweight Windows service that connects your domain to the Joinly cloud over an outbound HTTPS connection only — there are no inbound ports to open.
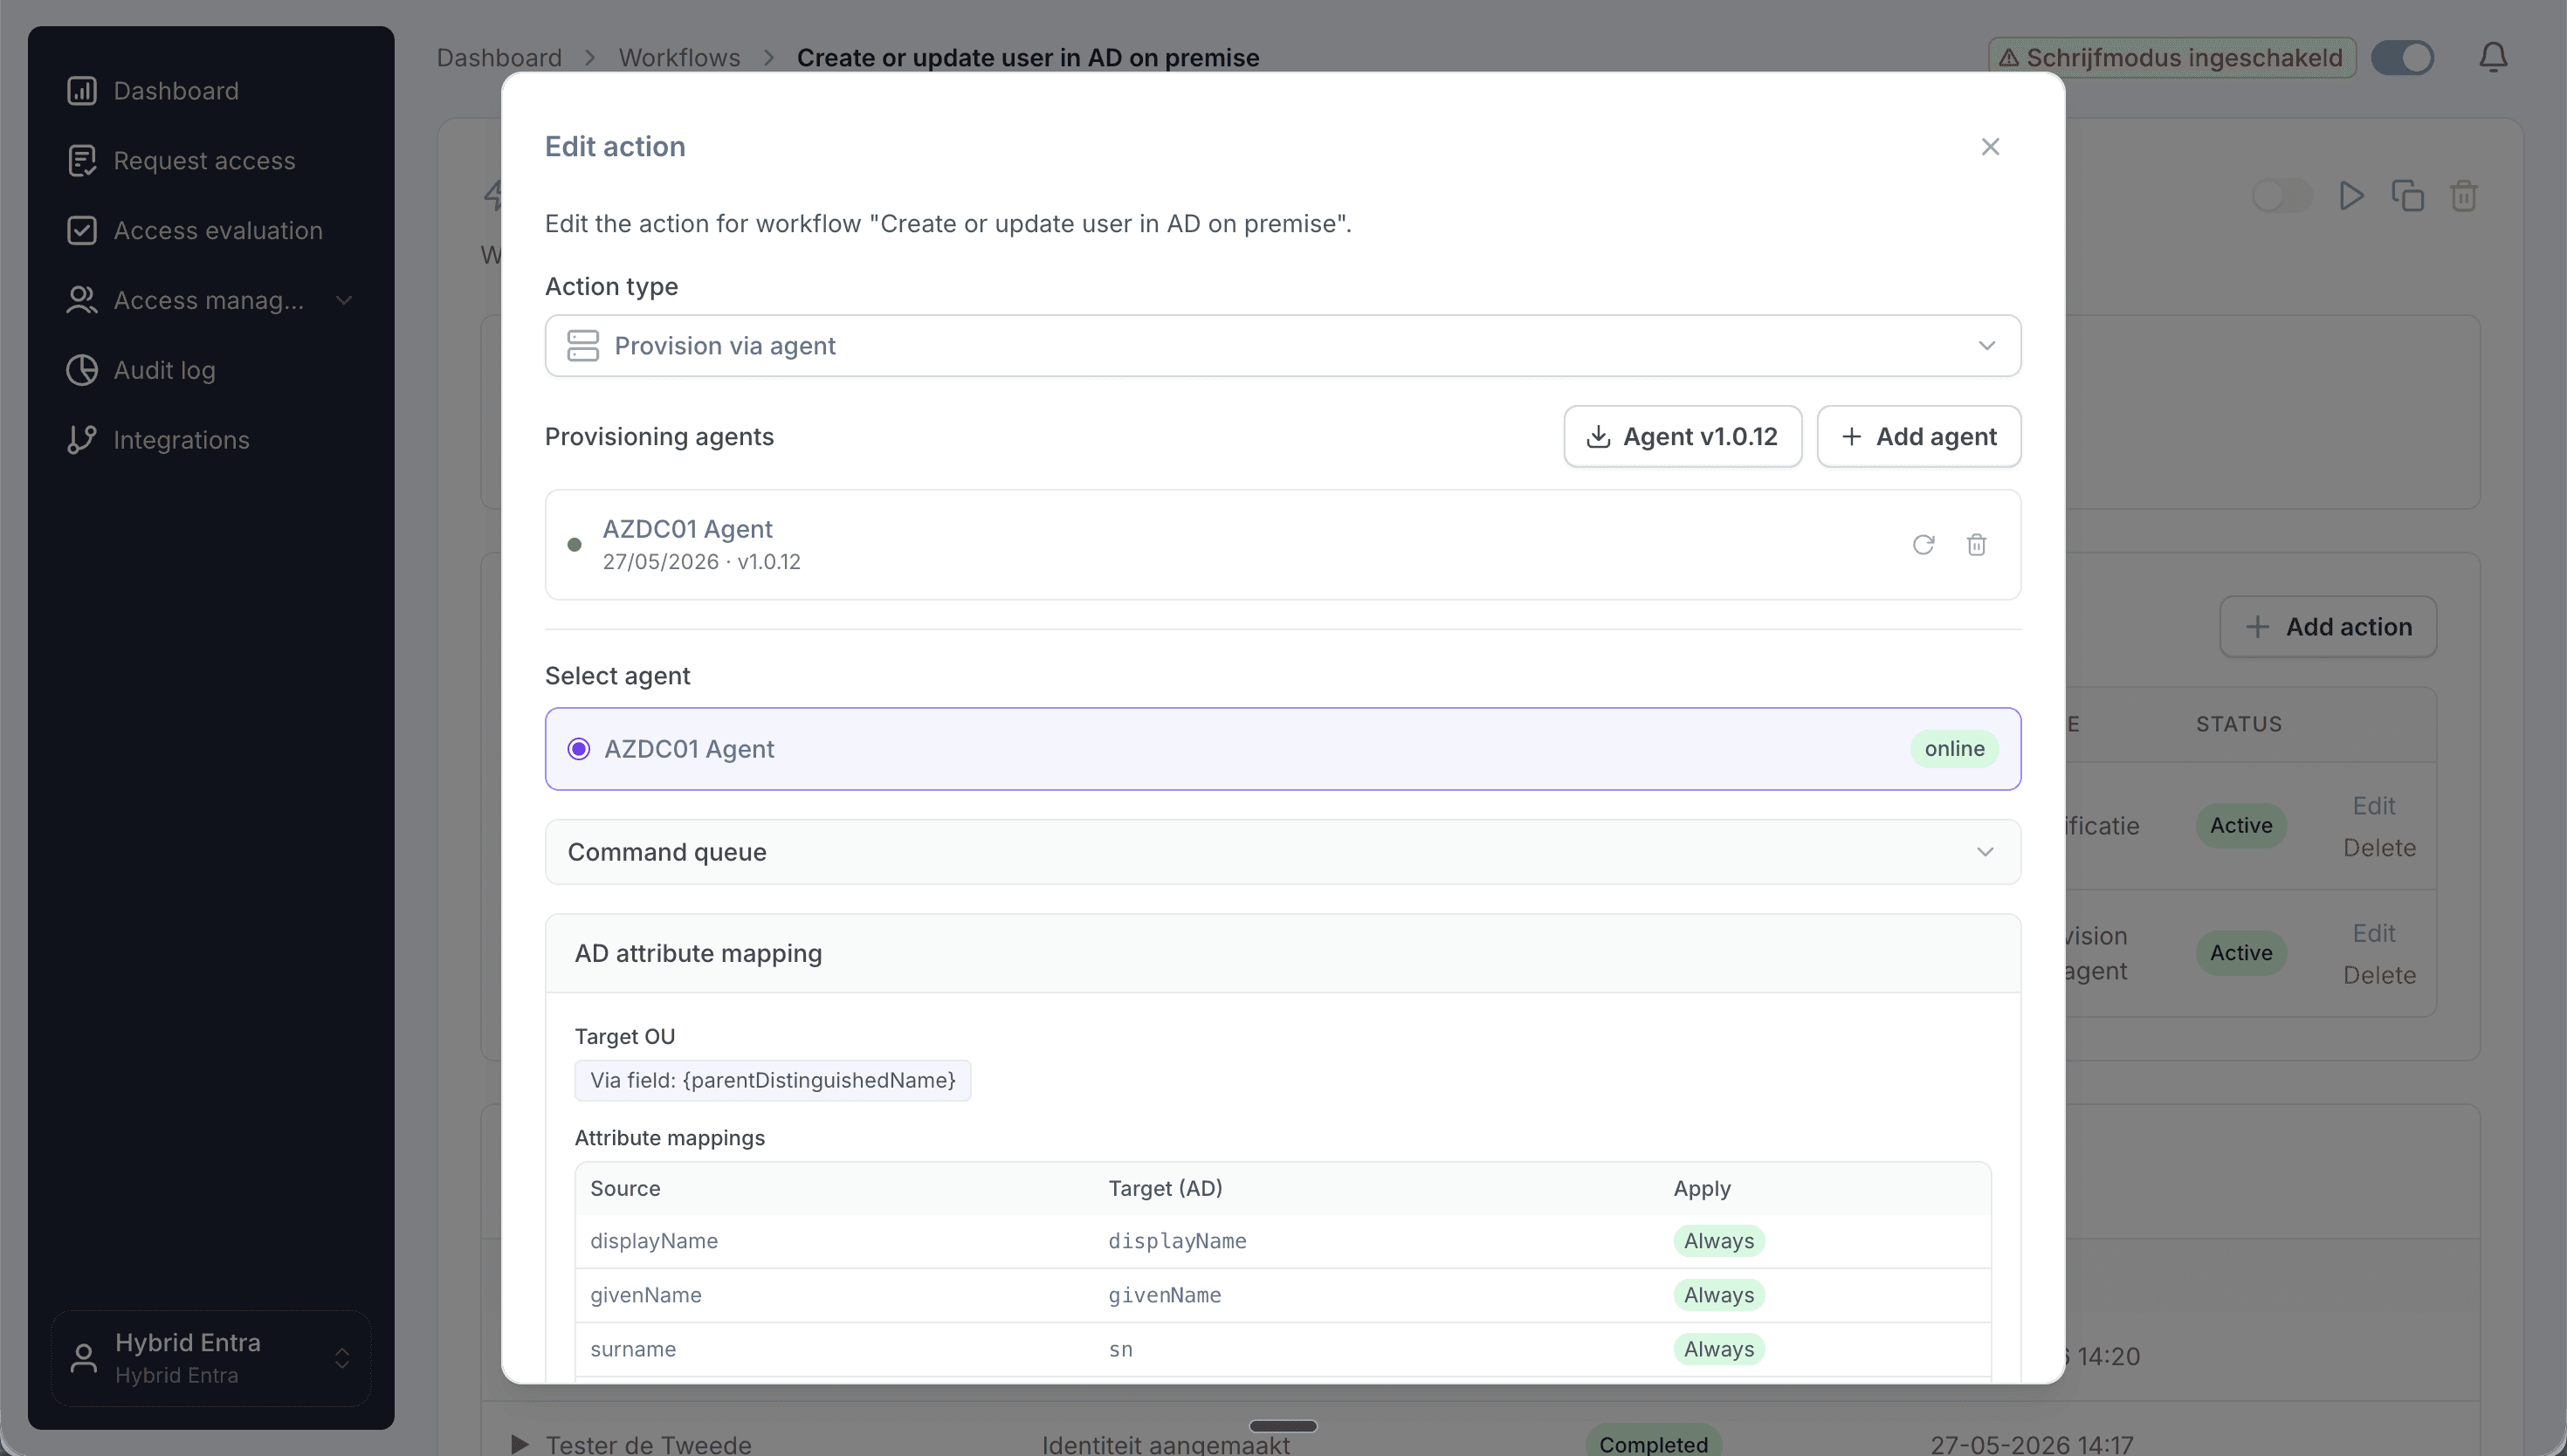
Download the Joinly AD Agent installer from the provisioning settings.
5. Install the agent on a domain-joined server
Run the installer on a domain-joined Windows server that can reach a domain controller. The server needs outbound HTTPS (port 443) to the Joinly cloud and a GMSA account installation on your domain controller. Run through the installer; it registers the agent as a Windows service that starts automatically.
6. Pair the agent with your Joinly tenant
Copy the pairing token from Settings → Provisioning → AD Agent in the platform and paste it into the agent’s configuration screen. The agent uses the token to register securely with your tenant; once paired, its status shows as Connected in the platform.

Pair the agent with your tenant using the pairing token.
7. Set the target OU and attribute mapping
Configure where users are created and how their attributes are built. Map the distinguished name / OU from the werkgever and administratie, and build the sAMAccountName, userPrincipalName, mail, department and manager with Liquid templates — necessary because Loket supplies none of these directly.
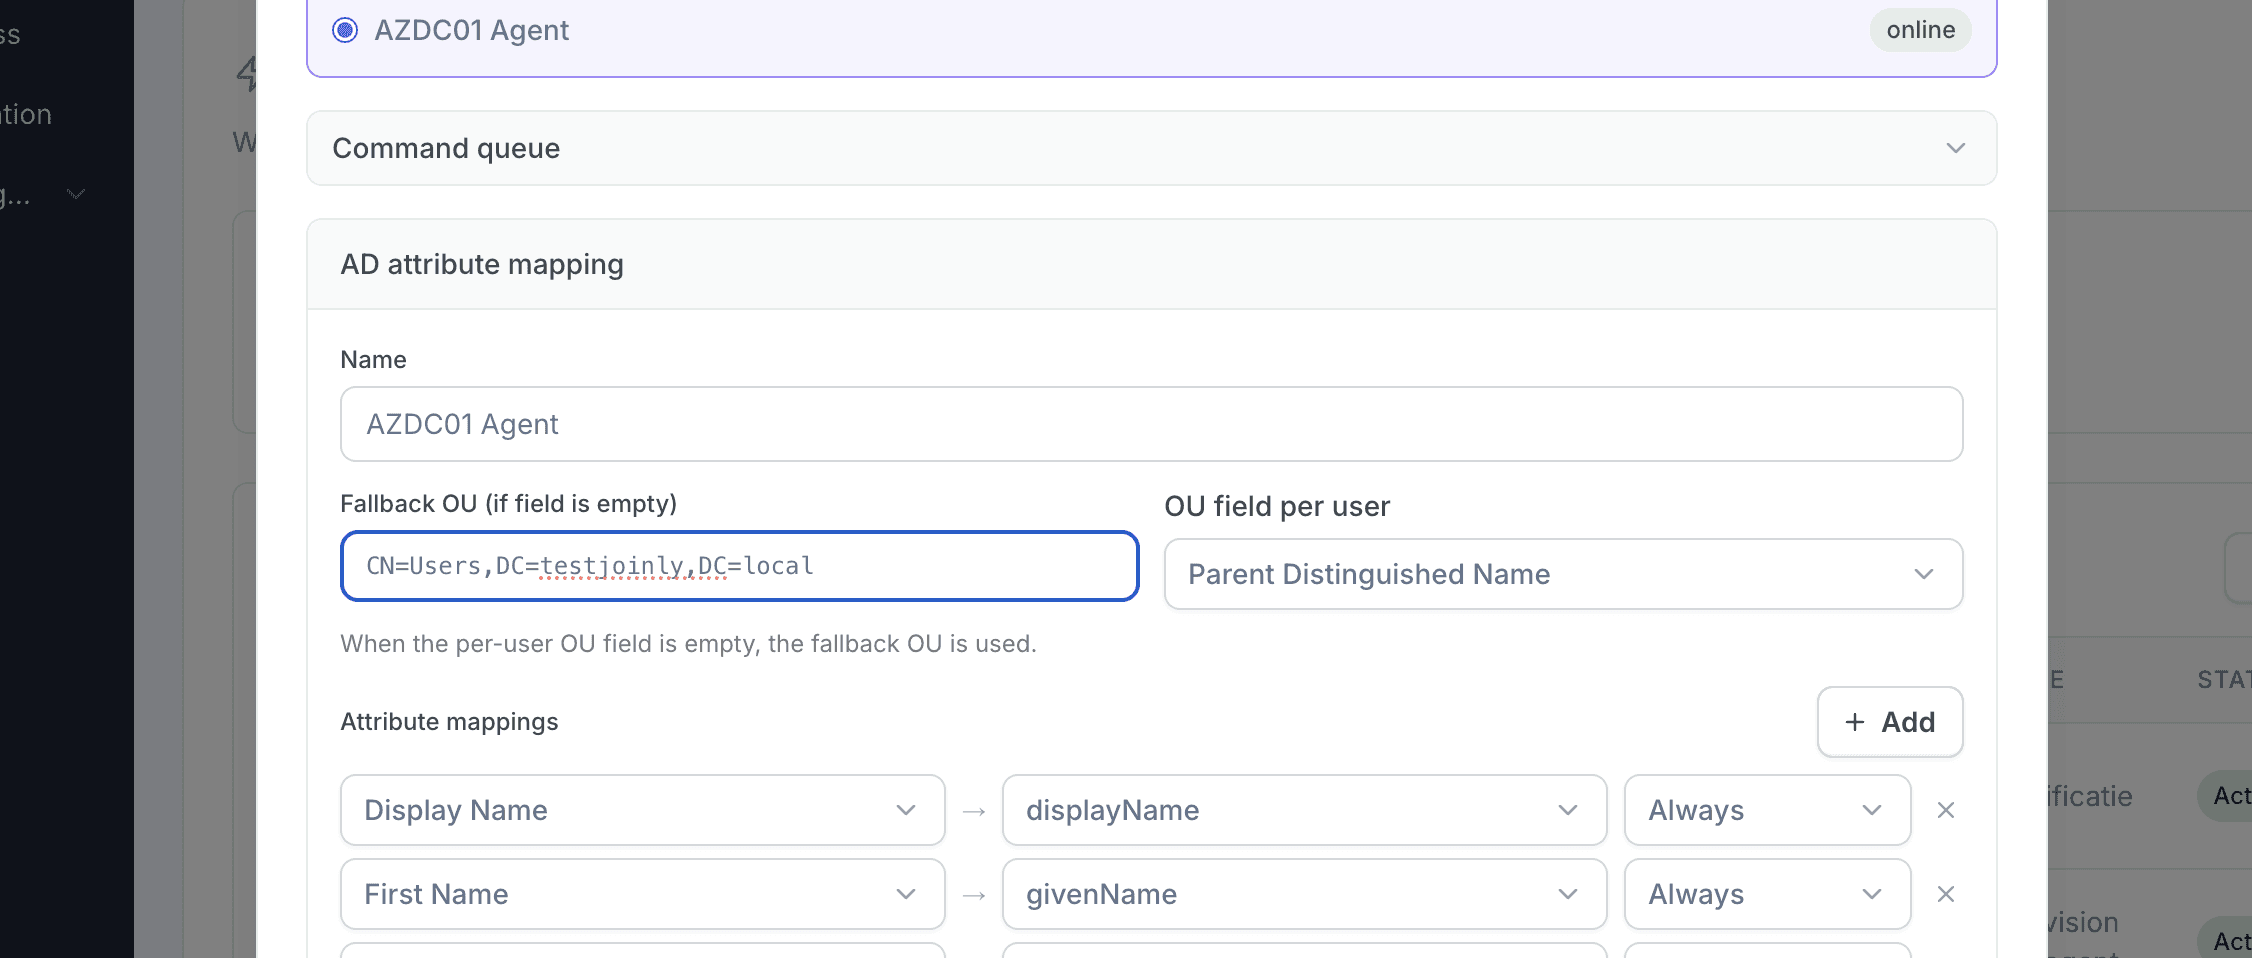
Select the OU and attribute mapping.
8. Configure your workflows
Create an onboarding (joiner) and offboarding (leaver) workflow with trigger-based execution, then an Identity updated workflow with a Create/update employee in Active Directory action so every change in Loket flows through the agent to AD. Add a threshold workflow that disables the account a set period after the end date of the dienstverband (for example 30 days), optionally moving it to a disabled-users OU.
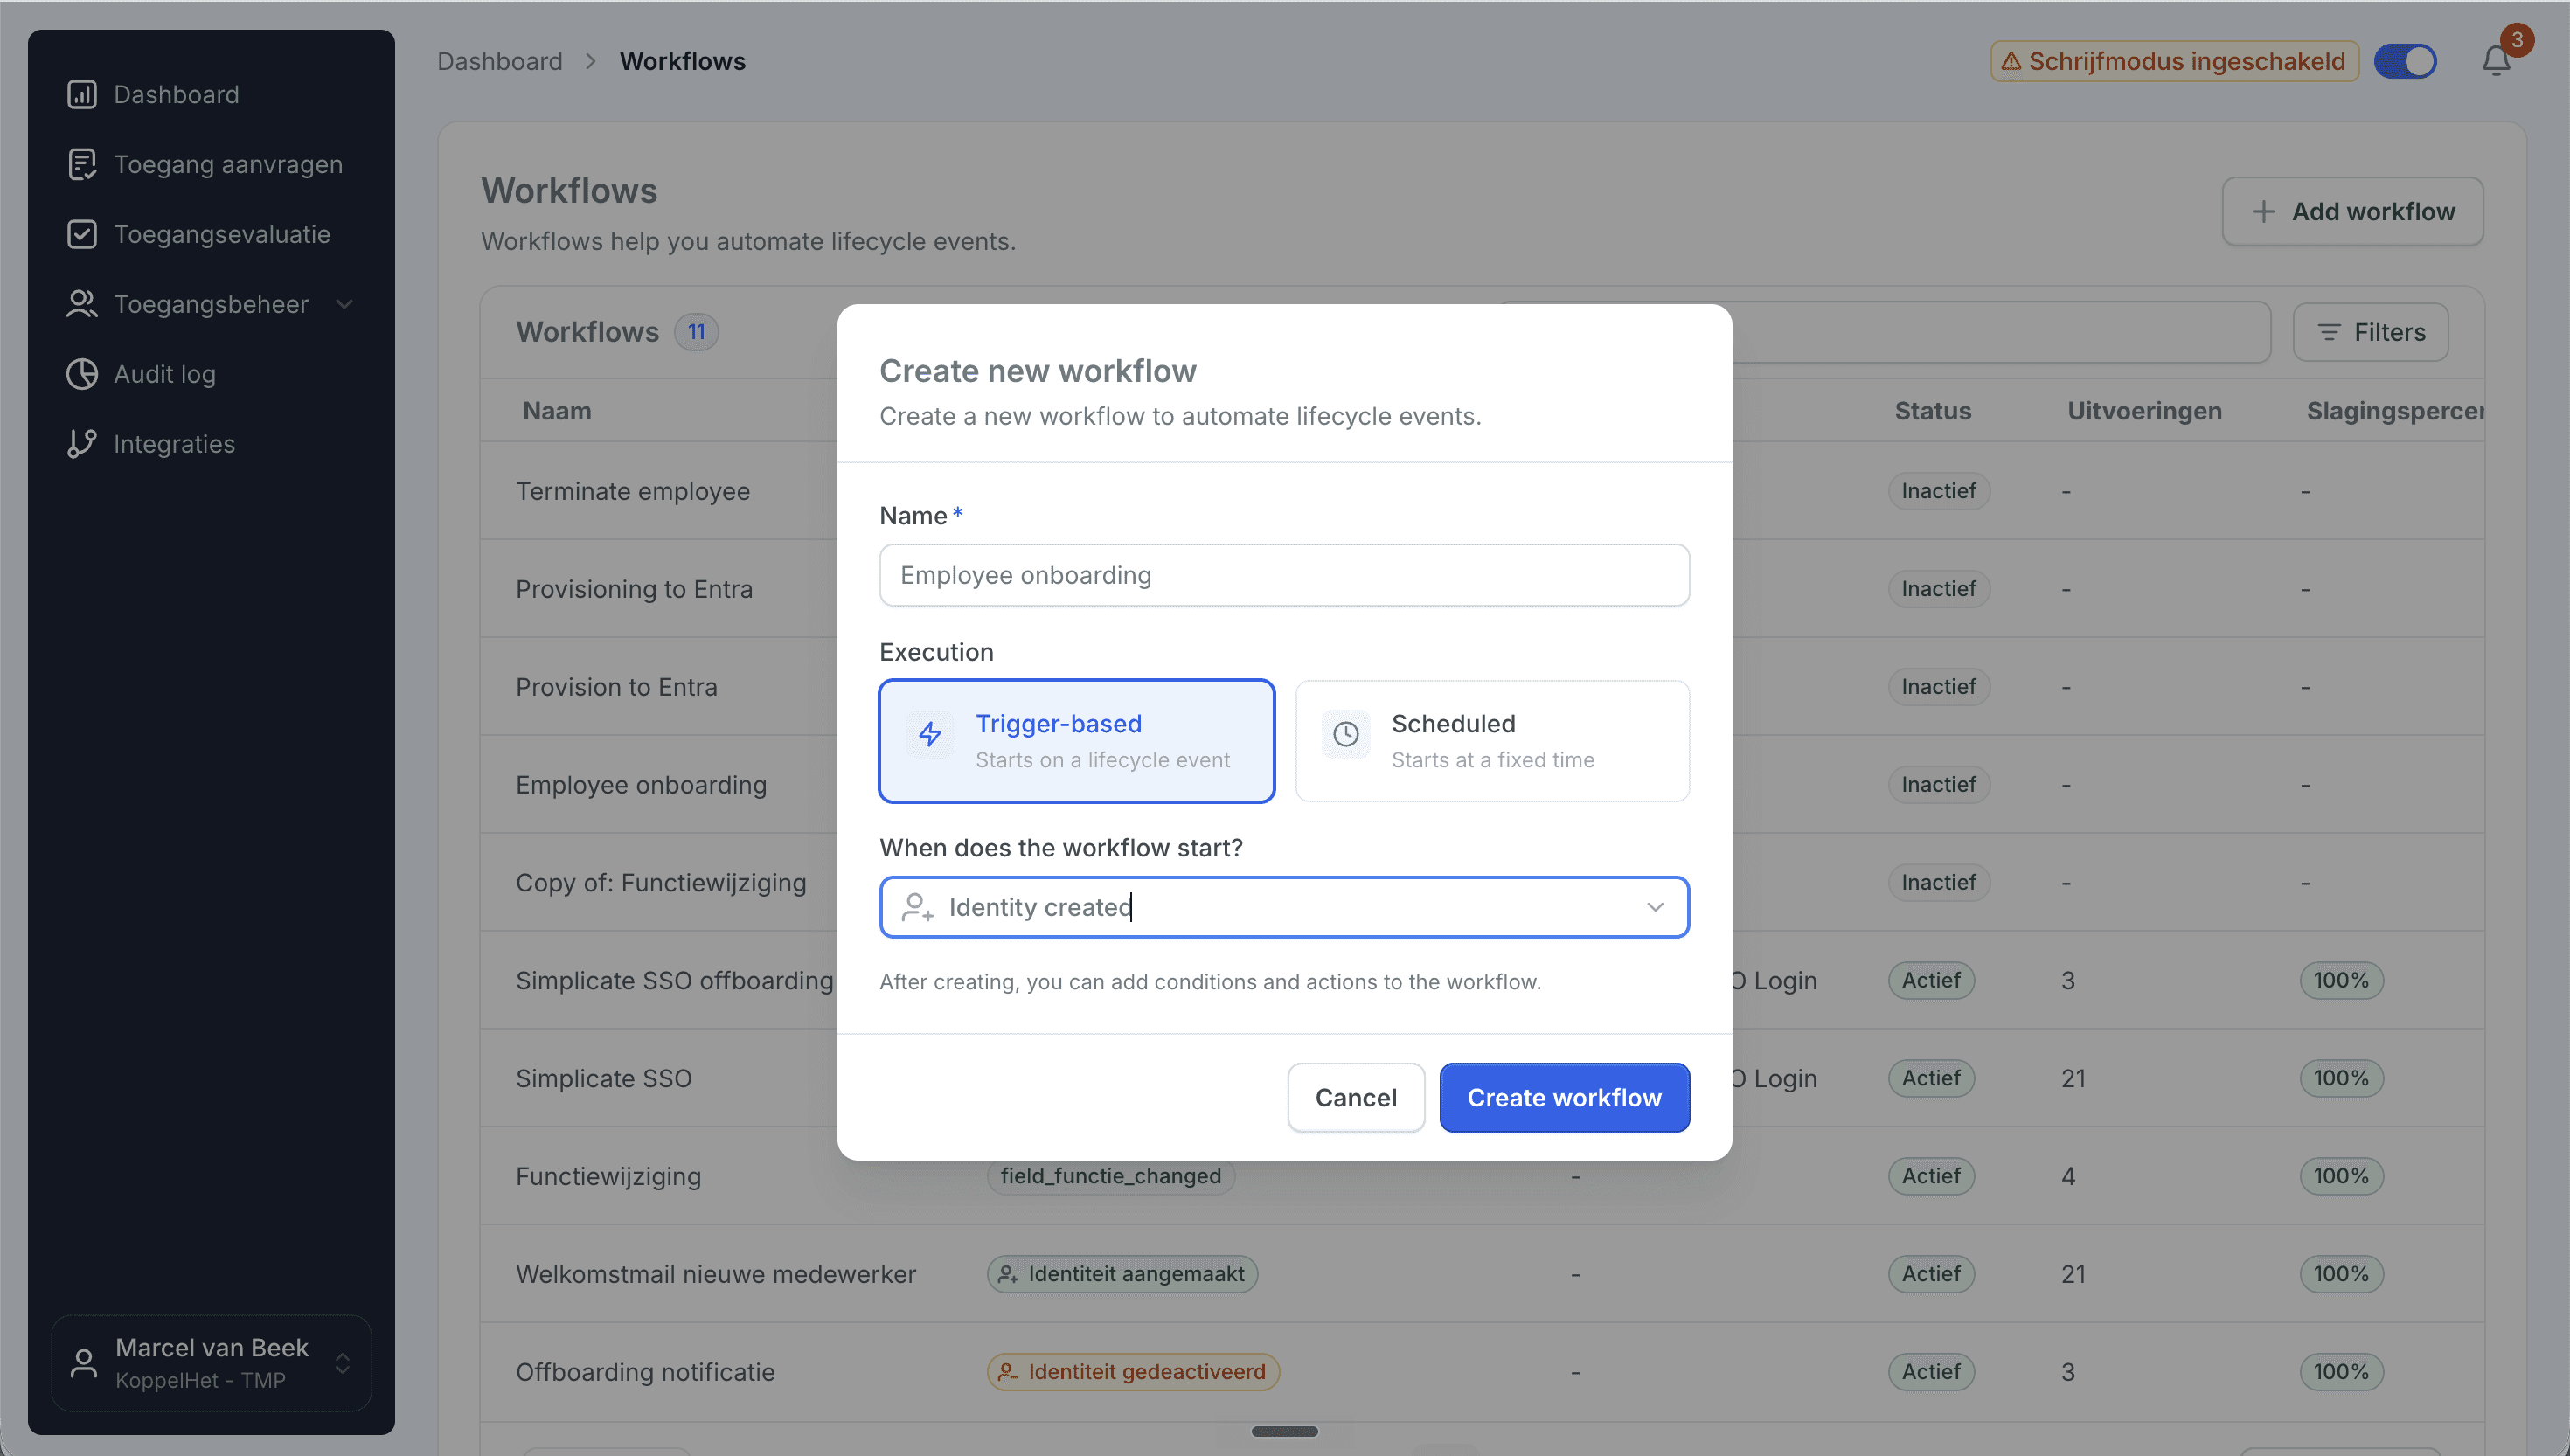
Create a trigger-based onboarding workflow.
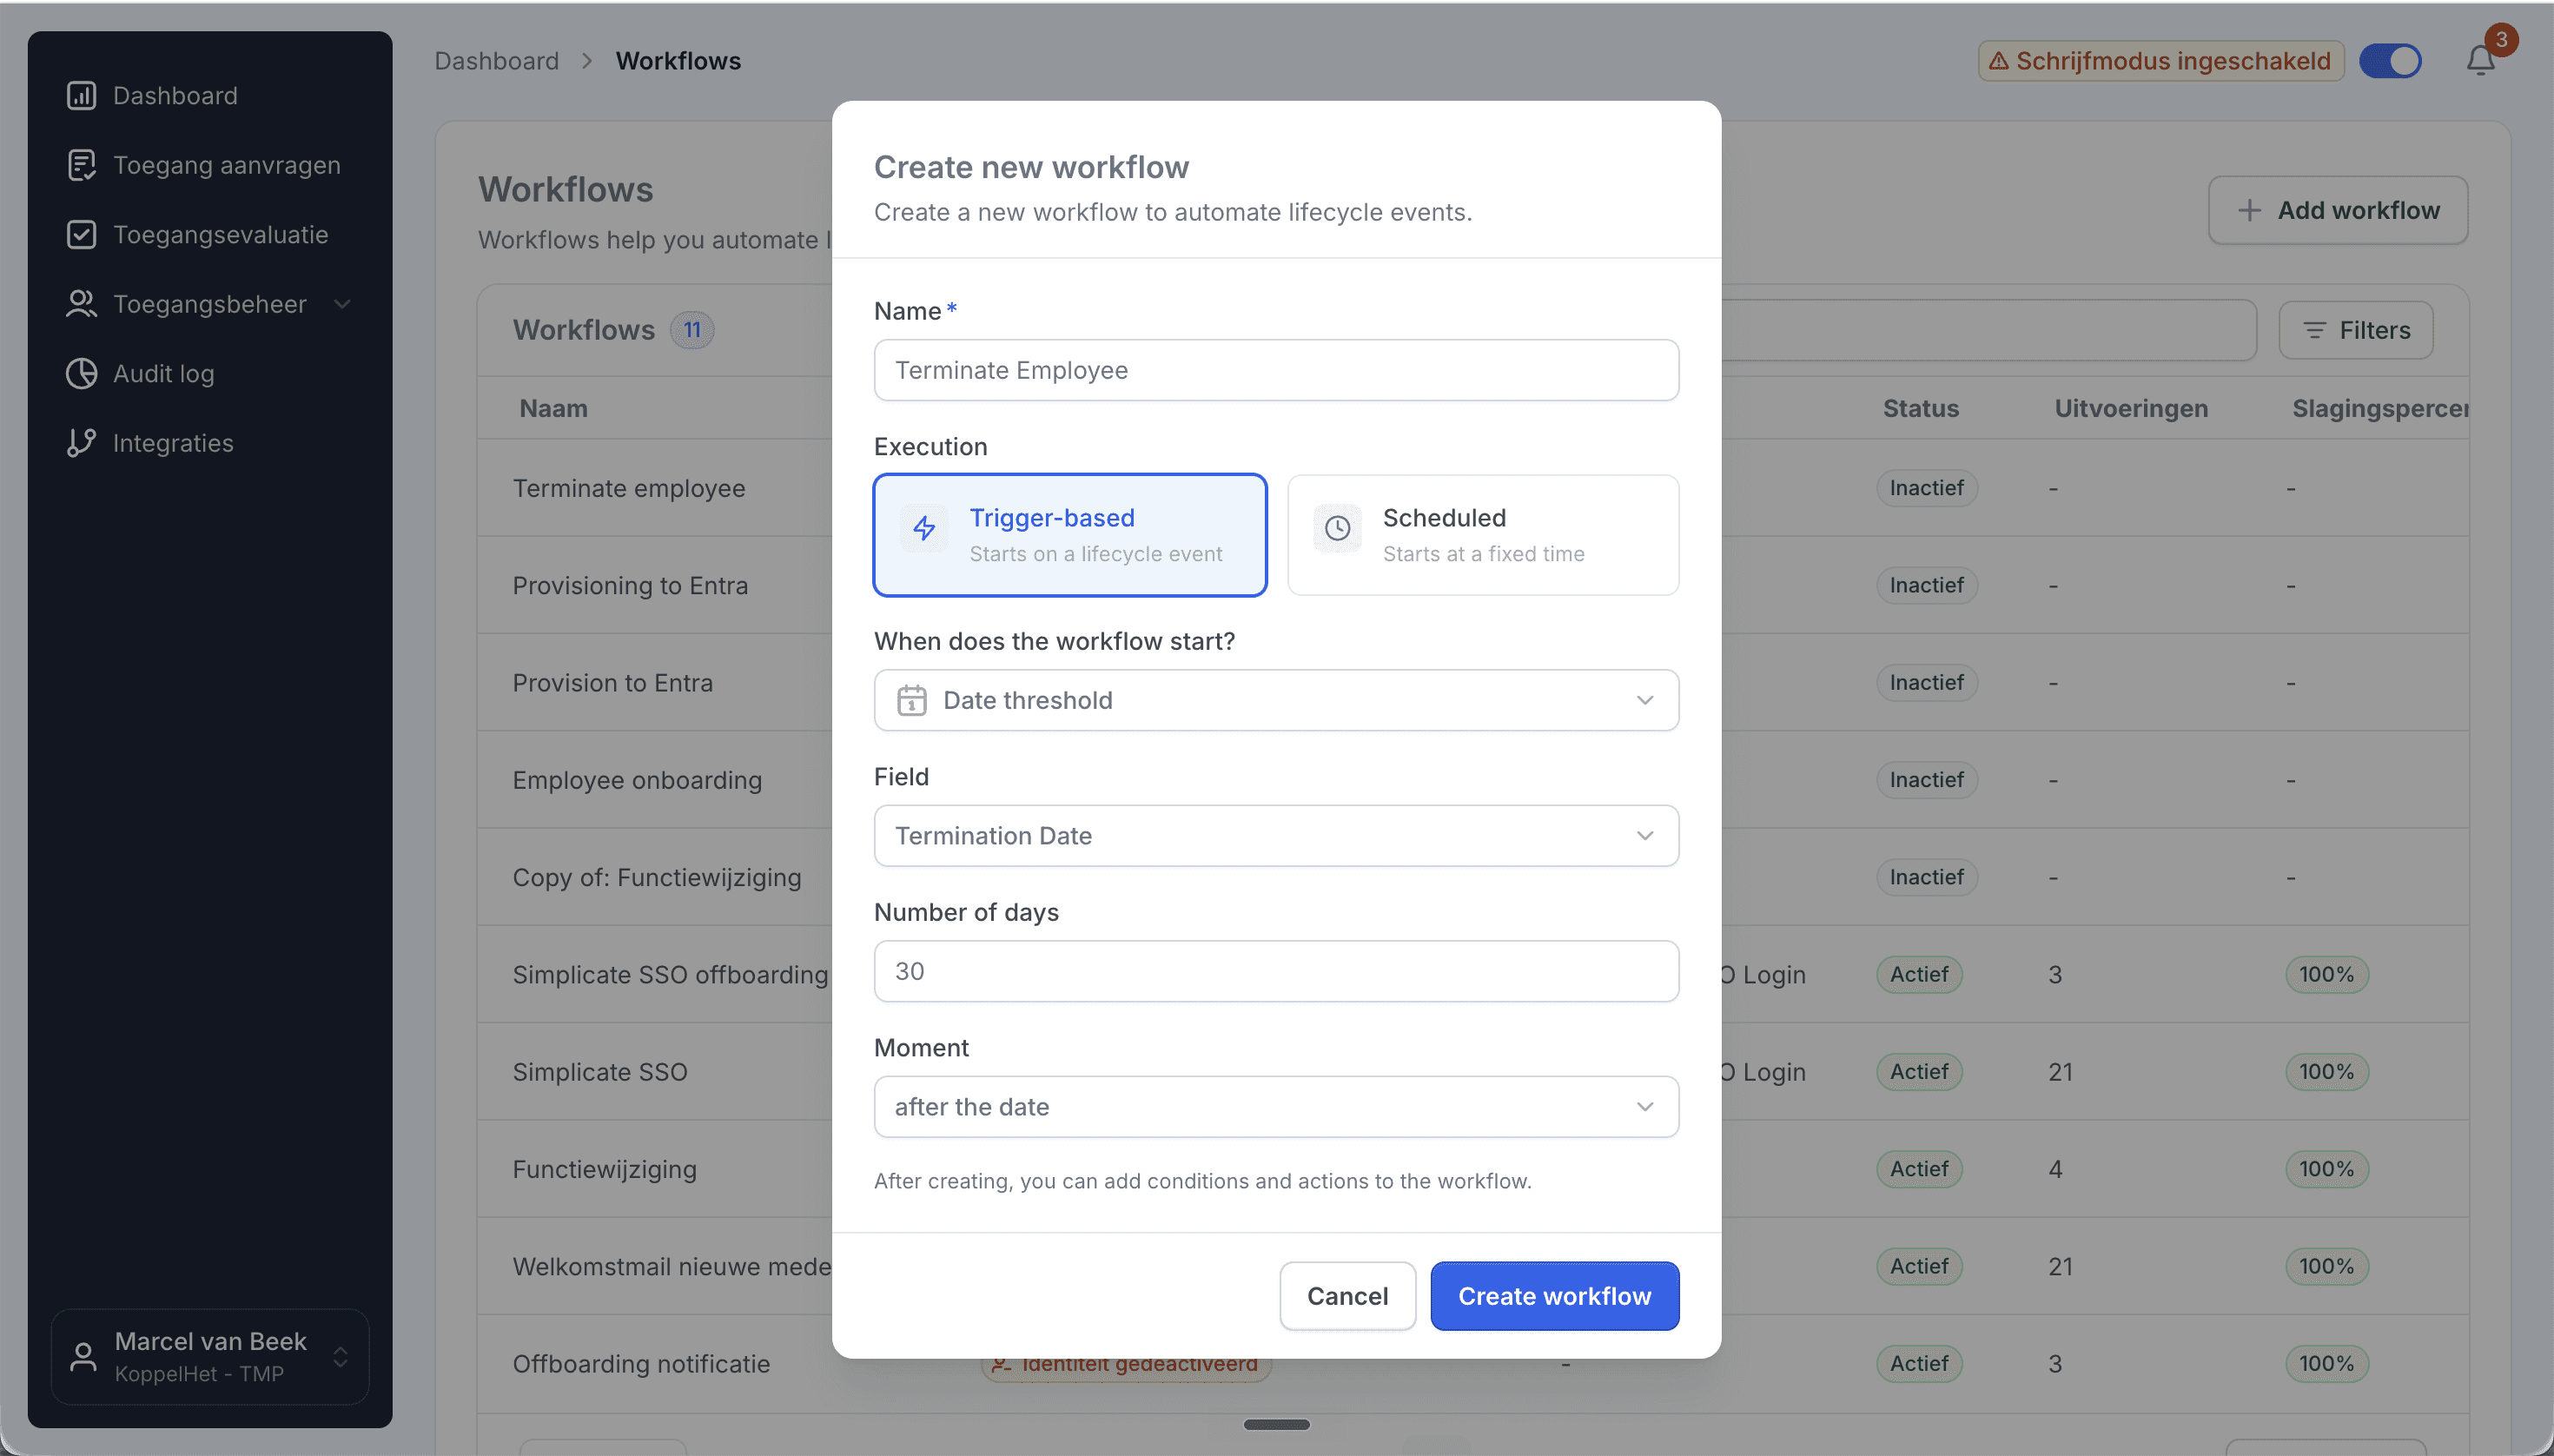
A date-threshold workflow disables accounts a set number of days after the end date.
9. Network and firewall requirements
The agent needs outbound HTTPS (443) to the Joinly cloud and a GMSA account with PowerShell access to your domain controllers. No inbound firewall rules are required, and no domain controller is exposed to the internet. For high availability you can run the agent on more than one server.
Need cloud Entra ID provisioning as well? See our guide on connecting Loket to Microsoft Entra ID, or contact support at support@koppelhet.nl.
Frequently asked questions
Does the Joinly AD Agent need inbound firewall openings?
No. The agent only makes an outbound HTTPS connection to the Joinly cloud and acts on your domain controllers from inside the network through a GMSA with PowerShell access. There are no inbound ports to open and no domain controller is exposed to the internet.
What account does the agent run under?
A Group Managed Service Account (GMSA) with PowerShell access to your domain controllers, scoped to the target OUs so it can create, move and disable user objects without domain-admin rights.
Which OU do new accounts land in?
The one your rules define. Joinly builds the distinguished name and OU placement from Loket’s werkgever and administratie structure, and moves the object to a new OU automatically when someone transfers.
How is the sAMAccountName built and kept unique?
From your Liquid template, with the generateUniqueUsername helper falling back to the next pattern on a collision, all within AD’s 20-character limit — Loket doesn’t supply a login name, so Joinly generates it.
Can I provision to both Active Directory and Entra ID?
Yes. The same Joinly setup drives a hybrid environment — the AD Agent for on-premise AD and the native Entra connection for the cloud. See the Loket to Entra ID guide.
Can I run more than one agent for high availability?
Yes. You can install the agent on multiple domain-joined servers so provisioning continues if one server is unavailable.
More than a connector
A standalone Loket to Active Directory connection is a good start, but identity rarely stops at one target. The same Joinly setup extends to Entra ID for a hybrid environment and to your other systems, managing the complete chain from joiner to leaver with logging and governance built in. You review the exceptions; Joinly maintains the chain.
Request installation support
Other guides
Frequently asked
Questions about connecting Loket to On-premise Active Directory (AD DS)
How does Joinly connect Loket to on-premise Active Directory?
The connection reads HR changes at the source (Loket.nl REST API (OAuth 2.0) → Joinly AD Agent → Active Directory.) On the directory side the Joinly AD Agent runs inside your own network and makes the change in Active Directory. The agent polls Joinly for work over outbound HTTPS, so there is no inbound firewall rule, no VPN and no published endpoint. What it needs: domain-joined Windows server with a GMSA, outbound HTTPS (443) only.
Which HR events does the Loket → Active Directory connection handle?
Joiner, mover, leaver (incl. rehire, multiple dienstverbanden). Each event runs the workflow you configured for it: a joiner gets an account, groups and licences before the start date, a mover has the access of the old position removed and the new one added, and a leaver is disabled on the termination date.
Which Loket attributes are synced to Active Directory?
Name, sAMAccountName, UPN, mail, department, job title, manager, werkgever, distinguished name / OU, start and end date. The mapping is configurable per field with Liquid templates, so your own naming convention for the user principal name, display name and e-mail address keeps applying.
How often does Joinly sync Loket with Active Directory?
Frequent sync, multiple times per day. The import schedule is yours to set — hourly, daily or weekly at a fixed time — and every run only processes what changed since the previous one.
Will Joinly overwrite the accounts that already exist in Active Directory?
No. Joinly first imports your existing directory and matches those accounts to the employees from Loket. Existing accounts are recognised and adopted rather than created twice. Which matching strategy applies — user principal name, e-mail address, employee ID or a person identifier — is a setting.
Can I try this without anything being written?
Yes. Run the import as a dry run and you get an Excel export of exactly what would happen. You can also leave the connection in read-only mode, where Joinly calculates everything but writes nothing, and set thresholds for how many creations, activations and deactivations one run may produce before it is blocked for approval.
Is Loket a ready-made connector in Joinly?
Yes. Loket is a ready-made HR connector in Joinly: you enable it, enter the details of your Loket environment and Joinly reads the employees from there. Nothing has to be developed on either side.
What happens when someone has more than one contract in Loket?
Joinly recognises that it is one person and decides which employment leads for the account, the manager and the department. You do not get two accounts for the same employee, and when one contract ends the account is only disabled when the last active employment ends.
Do I have to open my firewall for the Joinly AD Agent?
No. The agent initiates every connection itself: it checks in, collects pending commands and reports the result back. Because execution is asynchronous, a workflow waits for the real outcome from Active Directory before the follow-up steps run, so you never get a false confirmation.
Does the Loket → Active Directory connection support NIS2 and ISO 27001?
ISO 27001, NIS2-ready, GDPR (EU data centre). Every mutation lands in the audit log with its source — HR import, manual, from Entra, by the system or through an API key — and a link to the workflow that caused it. That is the evidence an auditor asks for when they want to know who had access to what, and why.
More on Loket
Everything Joinly publishes about Loket: the other installation guide, how the connection compares with Microsoft's own provisioning, what offboarding looks like, and the SCIM route.
See what Joinly can do for your organisation?
Start a free trial today or get in touch for advice on your HR and Microsoft environment.