
Entra ID · Overig
How do you set up Entra ID groups for role access?
You set up role access in Entra ID by creating a security group for each job title or role that carries the access: applications, licences and data are linked to the group, never to the individual. You then populate the group automatically based on HR attributes such as department and job title, using dynamic membership rules or through provisioning from your HR system. In this article, you will read how to design the model, what choices to make and how to set it up step by step.
Marcel van Beek · IAM Specialist · 5 min read
You set up role access in Entra ID by creating a security group for each function or role that carries the access: applications, licences and data are linked to the group, never to the person. You then populate the group automatically based on HR attributes such as department and job title, via dynamic membership rules or via provisioning from your HR system. In this article you will read how to design the model, which choices to make and how to set it up step by step.
Why this is important: as long as you allocate permissions per person, every onboarding is manual work, every job change a gamble and every offboarding a risk. Anyone who can still access personnel files after three job changes is not an incident, but the predictable result of person-level access.
Quick facts
Fact | Value |
|---|---|
Required role | At least Groups Administrator |
Where | entra.microsoft.com → Entra ID → Groups → All groups |
Licence | Assigned groups: free. Dynamic groups: Entra ID P1 for each unique user in one or more dynamic groups |
Dynamic rules processing time | Usually minutes, Microsoft guarantees processing within 24 hours |
Limits | Max 15,000 dynamic groups per tenant; rule builder max 5 expressions (then syntax editor) |
Please note | Nested groups do NOT count for licence assignment and app assignment; role-assignable groups only support assigned membership |
Time investment | Design 2 to 4 hours, then about 15 minutes per role |
From people to roles: the model
Role access means that you replace the question "what is Jan allowed to do?" with "what is a finance Employee allowed to do?". The chain becomes: person → role → group → permissions. Jan is a finance Employee, so he is a member of the role group Finance-Employee, and that group gives access to the accounting package, the correct Microsoft 365 licence and the financial SharePoint site.
The design does not start in the portal but in a spreadsheet: put your job titles from HR in the rows and your applications, licences and data locations in the columns. That is your authorization matrix in the making. Start with the five largest job groups, which in practice cover 60 to 80 per cent of your employees. Refine after that.
Role groups and resource groups
On paper you want two layers: role groups that describe who someone is (ROLE-Finance-Employee) and resource groups that describe what someone gets (APP-Exact-Users, LIC-M365-E3). You then nest the role group inside the resource groups, so that one membership regulates everything.
Here lies the most important pitfall of Entra ID: nesting does not work for licences and app assignment. Only direct members of a group are assigned the licence or application; members of nested groups are ignored. The memberOf function that partially solves this has been in preview for years and is not intended by Microsoft for production. In practice, this means that in pure Entra you choose from two options: flat role groups that you link directly to each resource, or tooling that automatically places members in the correct resource groups. Remember this point, it will return.
Dynamic or assigned?
Dynamic groups populate themselves based on a rule about user attributes, for example:
(user.department -eq "Finance") and (user.jobTitle -eq "Employee")That is the fastest route to role access, with three conditions. One: you need Entra ID P1 for each user in a dynamic group. Two: your HR attributes in Entra must be correct and remain populated, because a dynamic rule on an empty department field does nothing. Three: the security of the group is only as strong as the write permissions on the attributes in the rule. If users or a poorly secured sync can modify the department field, they can grant themselves access. So check who is allowed to write the attributes, especially for attributes that are synchronised from on-premises AD.
Furthermore, dynamic groups do not know exceptions: you cannot manually add a member to a dynamic group. So you cannot get the colleague who is temporarily helping out at Finance in there without messing up the rule or building a second group.
Assigned groups do give you that freedom, but shift the problem: someone has to maintain the membership. Without automation, that is the service desk, and then you are back to manual work.
Naming: boring but decisive
A convention like ROLE-<Department>-<JobTitle> and APP-<Application>-<PermissionLevel> seems like a detail, until in two years' time you have 400 groups and no one knows what "Group Finance 2 new" is for. Agree on the convention before you create the first group and enforce it with a naming policy. Give each group an owner and a description with the purpose. Your auditor is going to ask for it.
Why you want to manage this in Joinly
The native model breaks down on four points as soon as your organisation grows. The nesting limitation forces you to flat groups, so every new application means linking all role groups again. Dynamic rules scatter your authorization logic across dozens of separate groups without a central overview of who gets what and why. The rules only work within Entra: your on-premises AD groups, file shares and applications without Entra integration do not participate. And the P1 requirement makes dynamic groups a cost item for precisely those organisations that would benefit most from them.
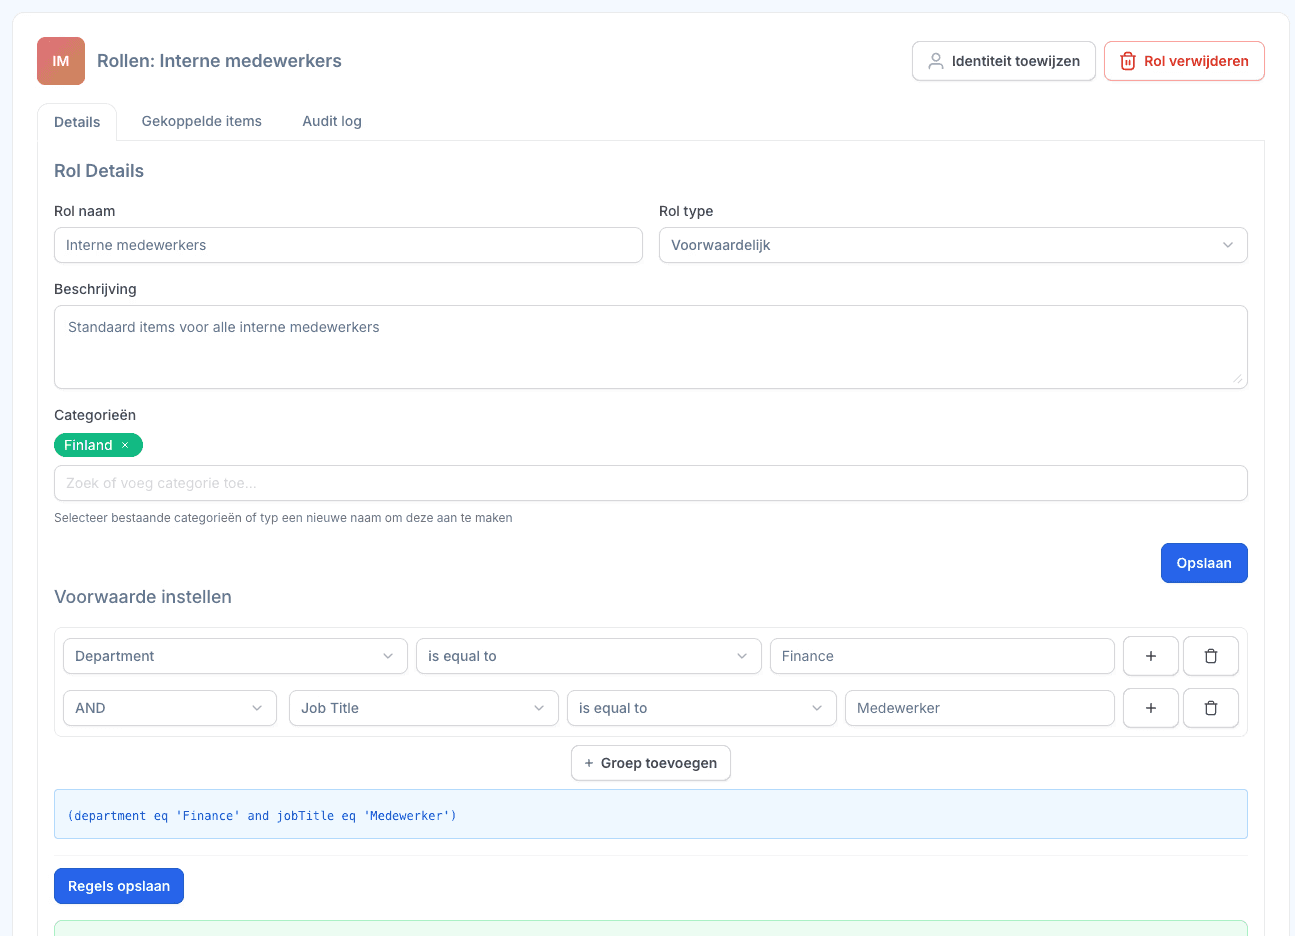
Joinly reverses this: the role model is central in one place and is populated from your HR system: AFAS, HR2Day, Visma Raet, YouServe or Workday. One business rule "department Finance + job title Employee" manages the membership of all associated groups, in Entra ID and on-premises AD, including exceptions with an end date and an audit trail per mutation. Job change in HR? The old permissions are removed, the new ones added, without a ticket.
Curious about the state of your current group structure? Do the free scan at scan.joinly.app and see within ten minutes where your role access model deviates from best practice.
This is how you do it
Step 1: Design your matrix
Create a spreadsheet with job titles (from HR) in the rows and resources in the columns: applications, licences, SharePoint sites, file shares. Fill in the permission level per cell. Let the relevant department manager have a look. IT does not know what Finance needs, Finance does.
Step 2: Establish your naming convention
For example: ROLE-Finance-Employee, APP-Exact-User, LIC-M365-E3. Document the convention and set up a group naming policy in Entra (Entra ID → Groups → All groups → Naming policy) so that deviant names are blocked.
Step 3: Create the role group
Go to entra.microsoft.com and sign in as at least Groups Administrator.
Navigate to Entra ID → Groups → All groups → New group.
Choose Group type: Security.
Fill in the name according to your convention and a clear description.
For Membership type, choose:
Dynamic User(orAssignedif you do the population via provisioning tooling).
Step 4: Build the dynamic rule
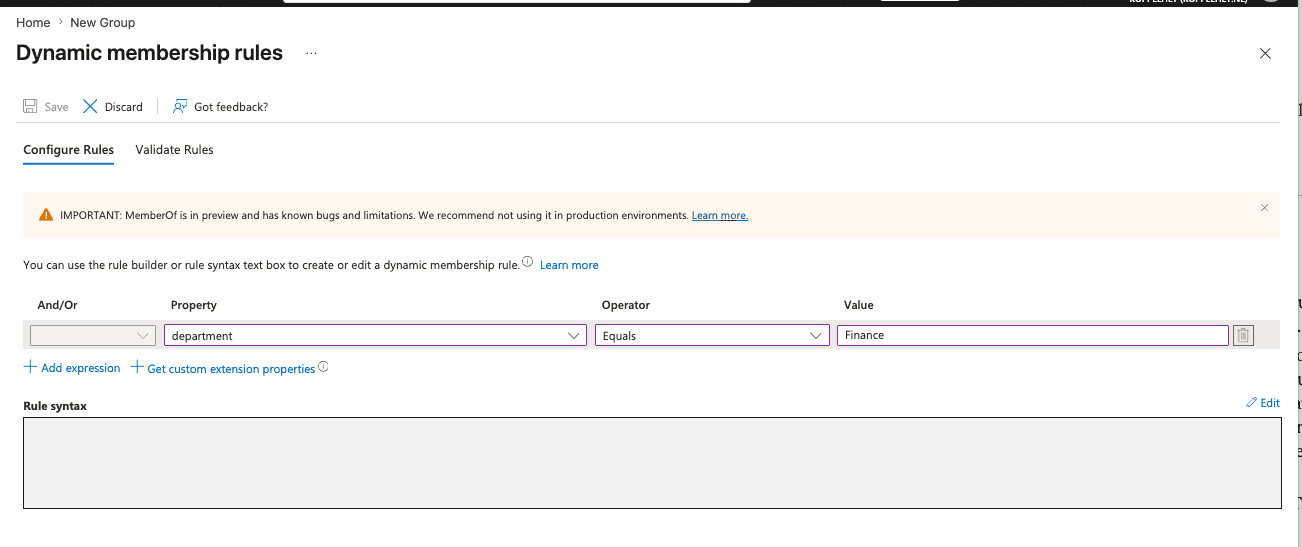
Click Add dynamic query.
Build in the rule builder: property
department, operatorEquals, valueFinance. Add a second expression forjobTitleif you want to differentiate per job title.Click Validate Rules and test with a few existing users whether the rule does what you expect.
Save with Save and click Create.
The rule is usually processed within a few minutes; for large tenants, it can take up to 24 hours. Then check the membership under Groups → your group → Members.
Step 5: Link the application to the group
Go to Entra ID → Enterprise applications and open the application.
Choose Users and groups → Add user/group.
Select your role group and, if the app supports roles, the correct app role.
Repeat this for each application from your matrix. Note: this only works with direct members; a nested group within your role group does not receive access.
Step 6: Link the licence to the group
Go to Entra ID → Billing → Licenses → All products.
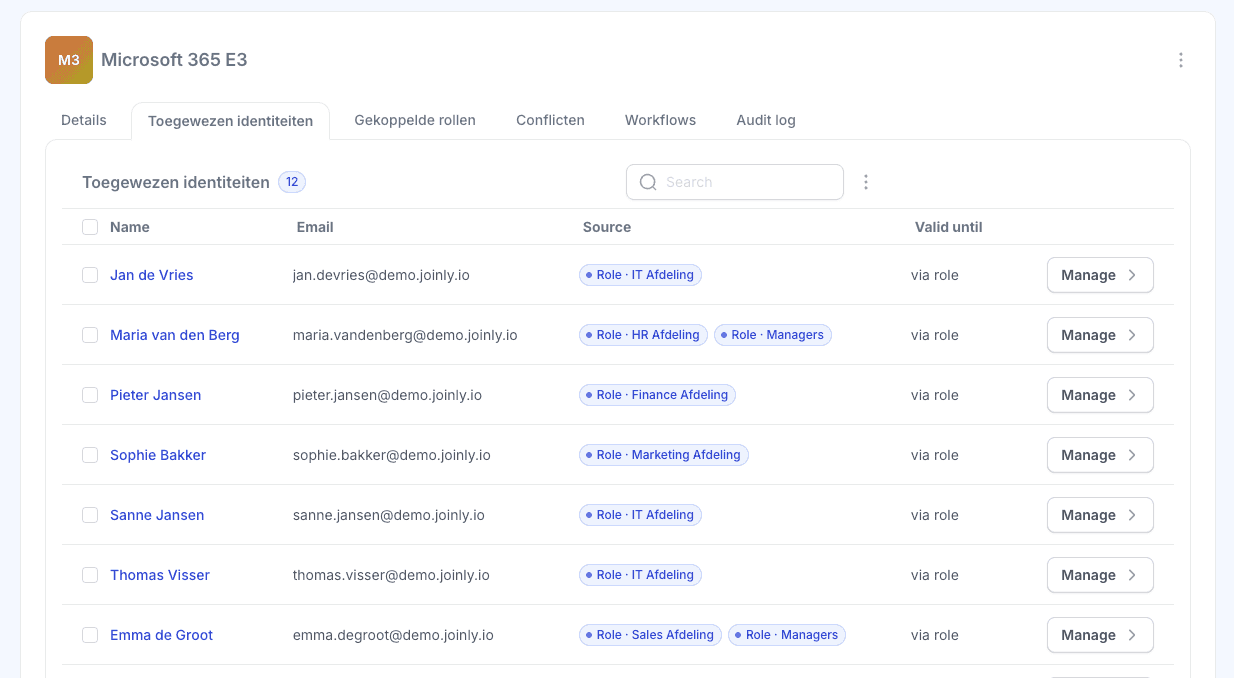
Select the licence (e.g. Microsoft 365 E3) and choose Assign.
Select your role group and optionally disable individual service plans.
Check for licence errors under the group after processing. The most common cause of failed assignments: a missing usageLocation for the user.
Step 7: Test the chain end-to-end
For a test user, change the department attribute to Finance and check in succession: do they become a member of the group, do they get the licence, does the app appear in myapps.microsoft.com. And equally important: does everything disappear again when you reset the attribute?
Alternative: via PowerShell/Graph
powershell
Connect-MgGraph -Scopes "Group.ReadWrite.All"

New-MgGroup -DisplayName "ROL-Finance-Medewerker" `
  -MailEnabled:$false -MailNickname "rol-finance-medewerker" `
  -SecurityEnabled:$true `
  -GroupTypes @("DynamicMembership") `
  -MembershipRule '(user.department -eq "Finance") and (user.jobTitle -eq "Employee")' `
  -MembershipRuleProcessingState "On"
This is how you do this in Joinly
In Joinly you define one business rule on the HR source data: department = Finance and job title = Employee. You link the desired outcomes to that rule: membership of the Entra groups, the on-premises AD groups, the licence and any accounts in applications outside. You register exceptions with a reason and an end date, and every mutation can be found in the audit trail. You then no longer need the dynamic rules, the P1 requirement and the nesting limitation from this article: the HR system is the source, Joinly executes.
Explore more blogs
Hoe richt je access reviews in voor groepslidmaatschap?
Hoe geef je toegang tot applicaties via groepen in Entra ID?
Applicatietoegang via groepen regel je in Entra ID door de app als enterprise application te registreren, onder Properties de optie "Assignment required" op Yes te zetten, en vervolgens onder Users and groups je toegangsgroep toe te wijzen, eventueel gekoppeld aan een app role. Vanaf dat moment bepaalt het groepslidmaatschap wie de app ziet en kan gebruiken. De valkuil: alleen directe leden tellen; een geneste groep binnen je toegangsgroep krijgt níéts. Wie dit goed inricht, heeft per applicatie één plek waar toegang geregeld is. Wie het overslaat, heeft apps die voor de hele organisatie openstaan zonder dat iemand dat ooit zo besloten heeft.
Marcel van Beek · 5 min read

How do you create dynamic groups based on HR attributes?
A dynamic group in Entra ID populates itself based on a rule regarding user attributes, for example, everyone with department Finance or jobTitle Team Leader. You create it via Entra ID → Groups → New group, choose membership type Dynamic User, and build the rule in the rule builder. The group only works as well as the HR attributes it runs on: if department and job title are not reliably stored in Entra, even the best rule will not work. The latter is the real work in practice. Building the rule takes five minutes; ensuring that department, jobTitle, and employeeType are populated and up to date for every Employee is an ongoing process. This article covers both sides.
Marcel van Beek · 8 min read
See what Joinly can do for your organisation?
Start a free trial today or get in touch for advice on your HR and Microsoft environment.