
Guide for setting up Microsoft Entra - HubSpot SCIM integration
Marcel van Beek
7 min. read
HubSpot SCIM Provisioning via Microsoft Entra ID (Azure AD)
This guide explains step by step how to configure SCIM provisioning between Microsoft Entra ID (Azure AD) and HubSpot using the Joinly (KoppelHet) platform.
With this integration, you fully automate HubSpot user management based on HR or IAM processes in Entra ID.
📋 Prerequisites
Make sure you have access to:
Microsoft Entra ID
Minimum Application Administrator permissions
Access to Enterprise Applications
Provisioning enabled in your tenant
HubSpot
Super Admin account
API access enabled
Active HubSpot subscription with user management
Joinly
Joinly account (free to create)
🎯 What does this integration do?
With this configuration you can:
✅ Automatically create users in HubSpot
✅ Synchronize users in real time
✅ Automatically assign roles
✅ Deactivate or remove users
✅ Fully automate the identity lifecycle
Step 1 — Create a Joinly Account
Go to:
Click:
Create your Joinly tenant
Log in to the platform
Step 2 — Connect HubSpot via Marketplace
2.1 Open the Integration Page
Go directly to:
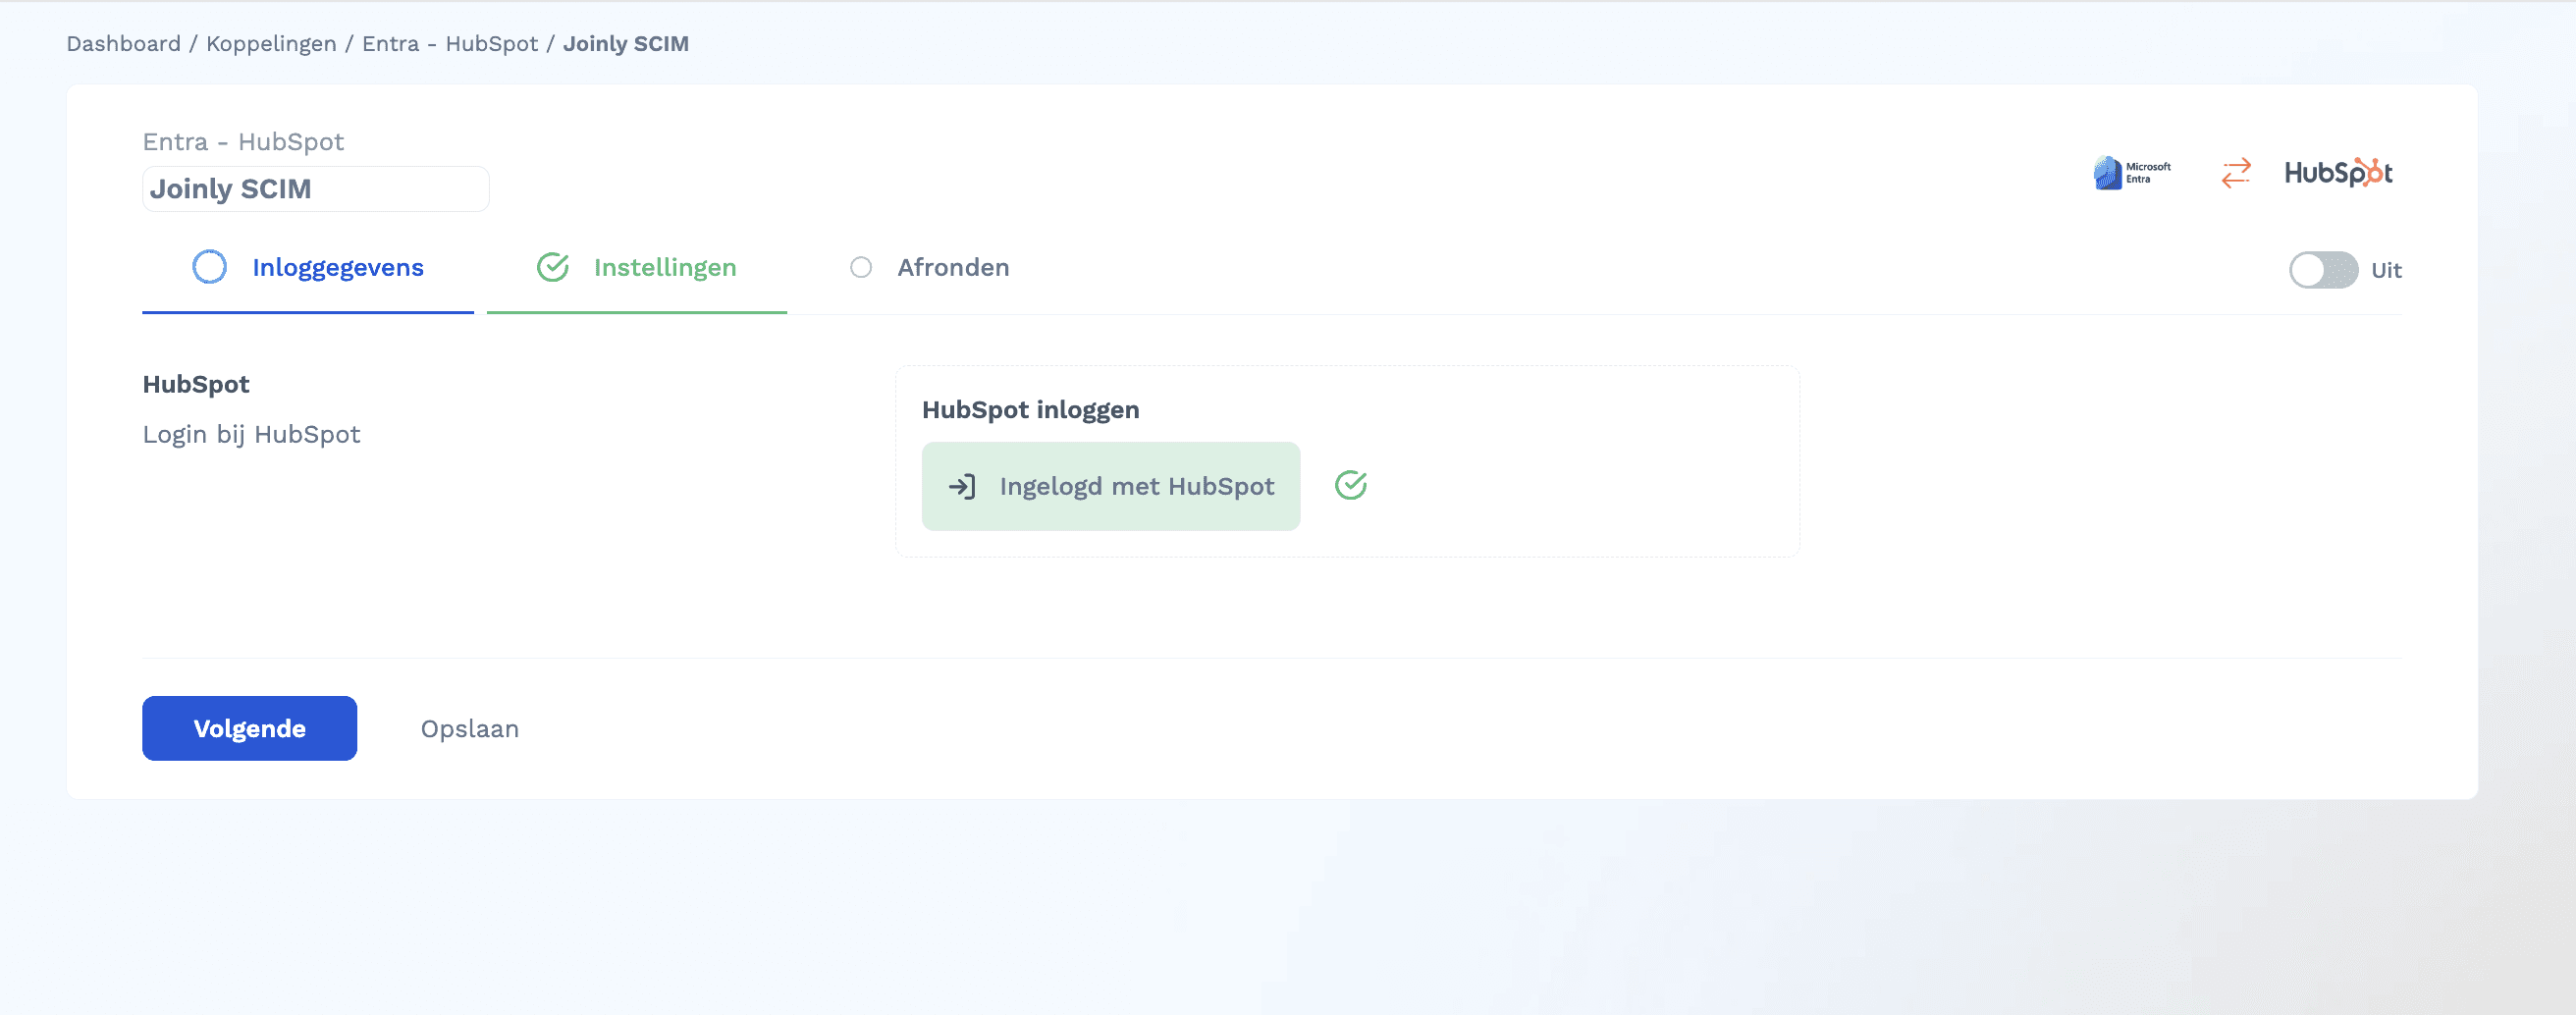
2.2 Start HubSpot Authorization
Click:
You will automatically be redirected to HubSpot OAuth.
2.3 Authorize Joinly in HubSpot
Log in with your HubSpot Super Admin account
Review the requested permissions
Click:
After successful authorization you will be redirected back to Joinly.
✅ HubSpot is now connected
✅ API tokens are managed automatically by Joinly
Step 3 — Configure the Integration in Joinly
3.1 Set Default Role
Inside the HubSpot integration:
Select:
This role will be assigned to new users when no explicit role mapping is configured.
3.2 Configure Role Mapping (Optional)
You can map Entra ID App Roles to HubSpot roles.
Example:
Entra Role | HubSpot Role |
|---|---|
Admin | Super Admin |
Manager | Sales Hub User |
User | Standard User |
This allows you to fully control authorization from Entra ID.

3.3 Activate the Integration
Click:
After activation, Joinly automatically generates:
✅ SCIM Endpoint URL
✅ SCIM Secret Token
👉 You will need these values for Entra ID configuration.
Step 4 — Configure SCIM in Microsoft Entra ID
4.1 Create Enterprise Application
Go to:
Navigate to:
Click:
Enter:
Select:
Click:
4.2 Configure Provisioning
Open the application
Go to:
Select:
Enter the following:
Tenant URL
➡ Paste the SCIM Endpoint URL from Joinly
Secret Token
➡ Paste the SCIM Secret Token from Joinly
Click:
If successful:
✅ HTTP 200 OK
Click:
Step 5 — Assign Users & Groups
Go to:
Click:
Add:
Test user
OREntra group (recommended)
Verify:
➡ Assigned roles match the Joinly role mapping
Step 6 — Configure Provisioning
6.1 Verify Attribute Mapping
Go to:
Verify that the following actions are enabled:
✔ Create users
✔ Update users
✔ Disable users
Joinly uses the standard SCIM schema mapping by default.
6.2 Run On-Demand Provisioning Test
Go to:
Select a test user
Click:
Check the logs:
✅ Success
❌ No errors
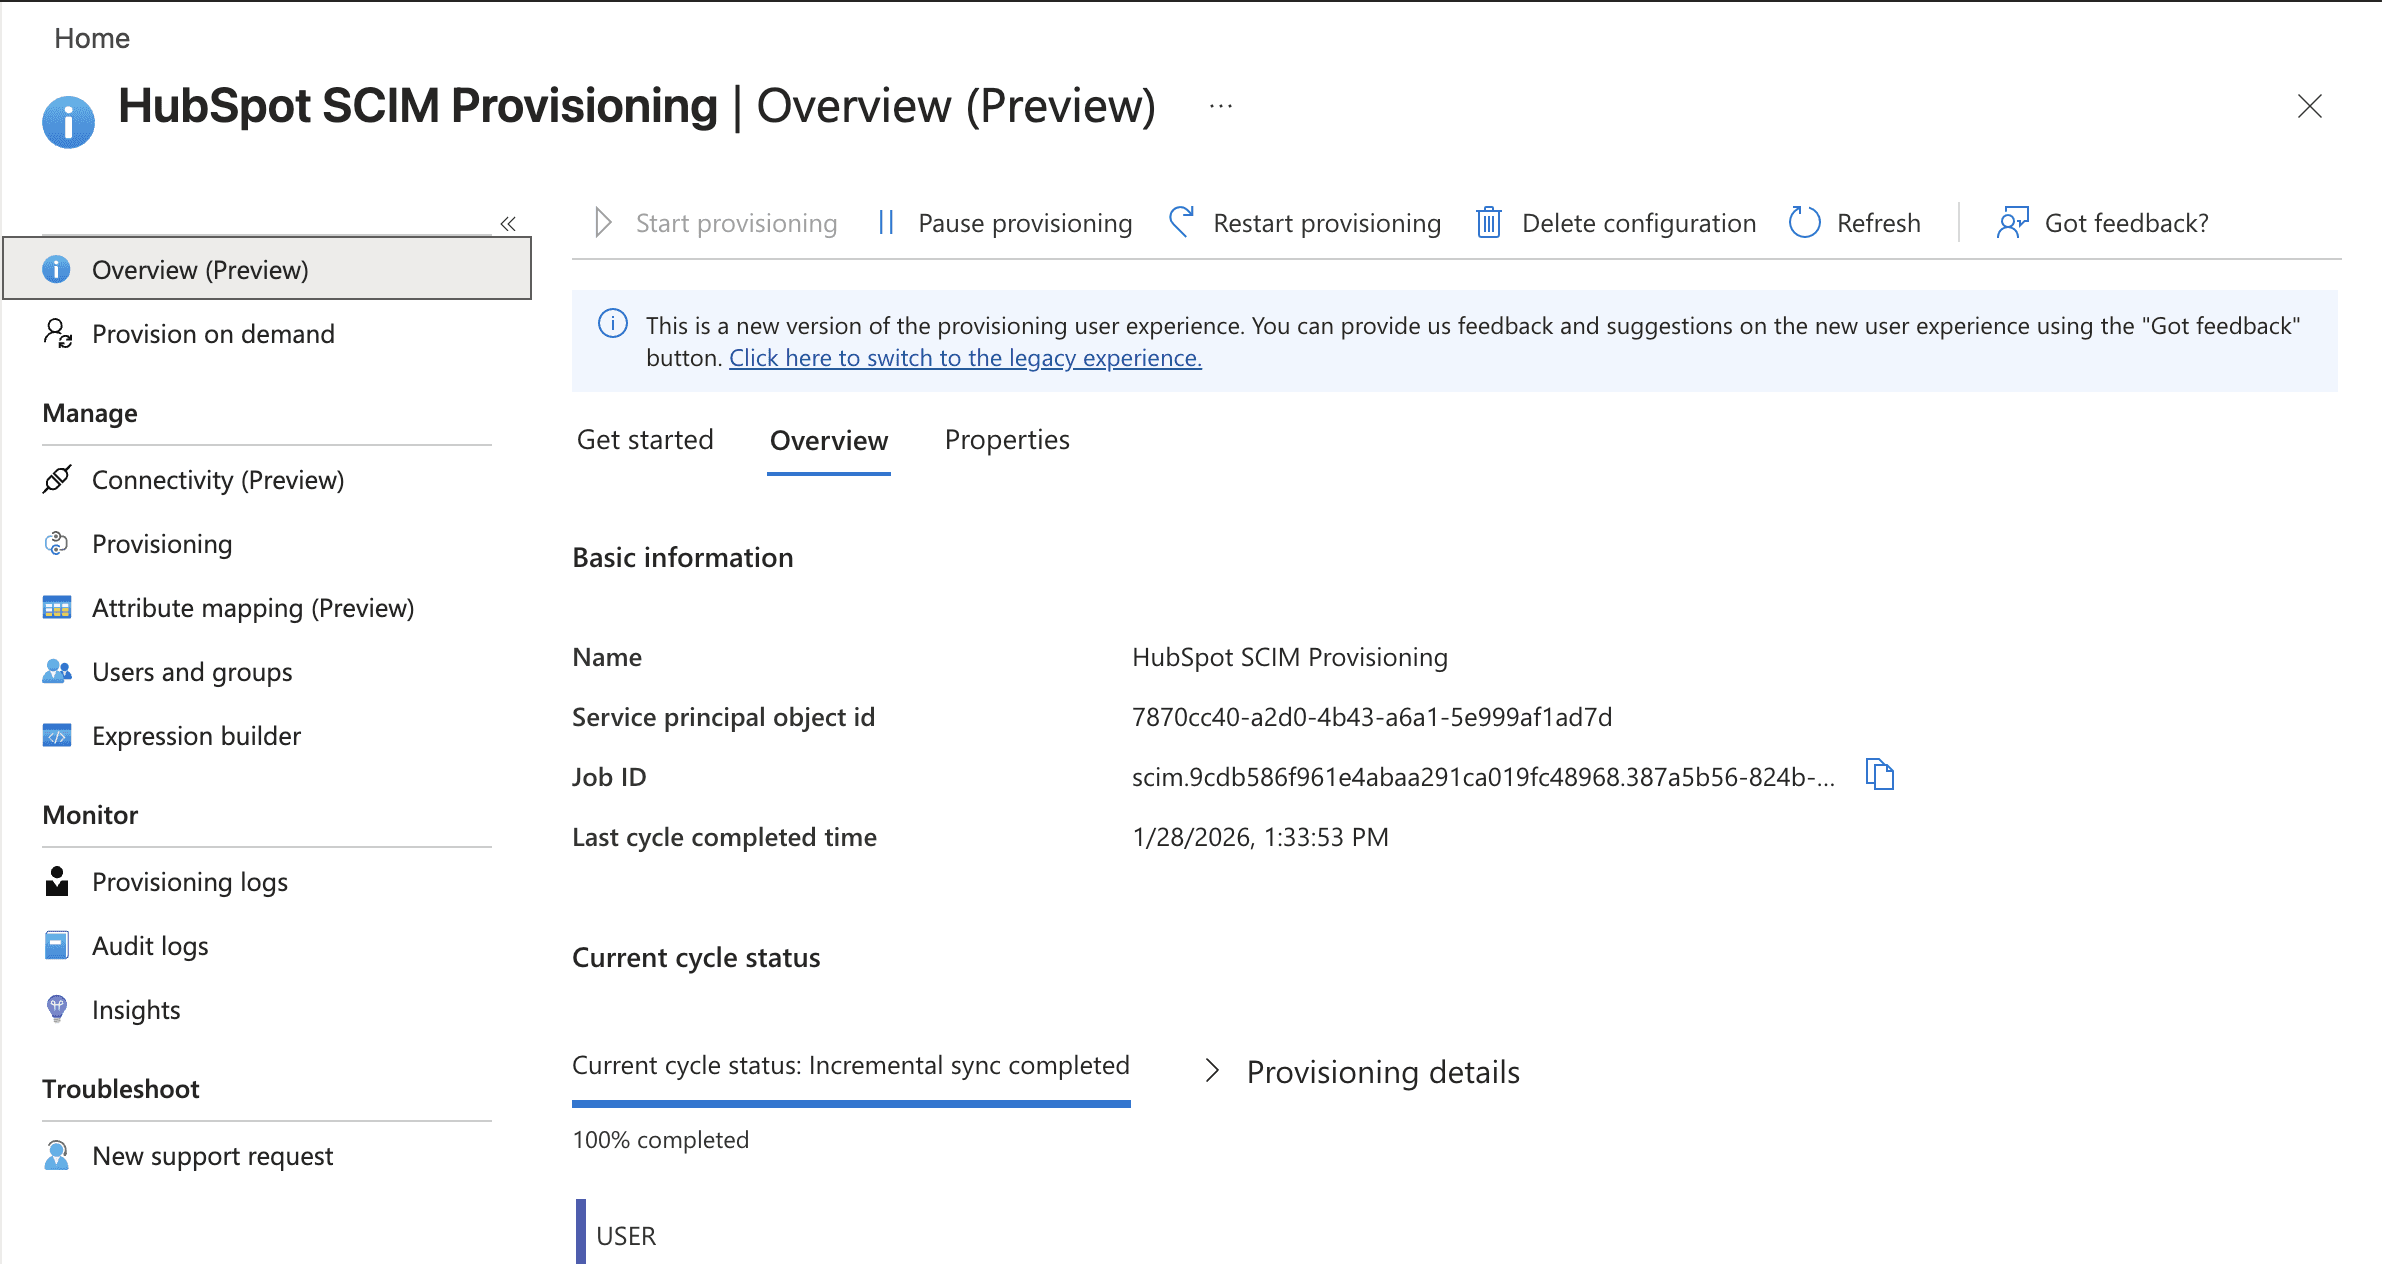
6.3 Start Provisioning
Return to:
Click:
⏱ Initial synchronization typically takes 20–40 minutes.
Step 7 — Validation
New User Test
Create a new user in Entra ID
Assign the user to the Joinly SCIM application
Check HubSpot:
✅ Account created
✅ Correct role assigned
✅ Active status
Update Test
Modify in Entra ID for example:
Name
Department
Role
Verify that changes appear in HubSpot.
Deactivation Test
Disable the user in Entra ID.
Verify:
✅ User deactivated in HubSpot
✅ Access revoked
Done ✅
Your HubSpot provisioning is now fully automated through Joinly and Microsoft Entra ID.
HR or IAM is now your single source of truth for HubSpot access management.

